Crochet Dumpling No-Sew Pattern
Make a squishy crochet dumpling in about 20 minutes, no sewing required.
You can make a tiny crochet dumpling that looks good enough to eat, and it takes about twenty minutes.
Crochet dumplings are the perfect little project when you want something cute but quick. No sewing, no complicated shaping, just a tube of single crochet that you cinch shut at the top.
This pattern works up in about 20 minutes, and you probably have the yarn and hook already. Even if you're new to crochet, the only stitches you need are chain, single crochet, and slip stitch.
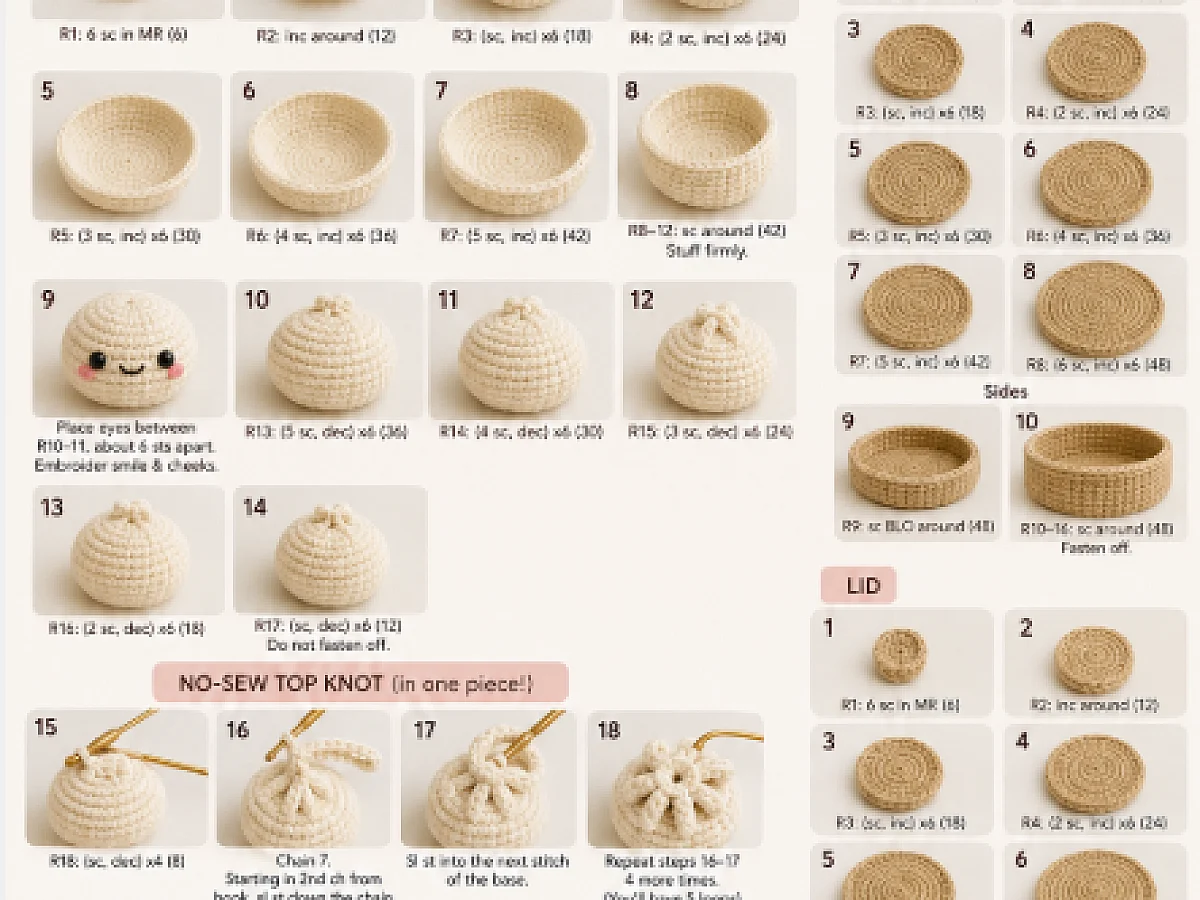
This no-sew pattern uses single crochet in the round, then you cinch the top to make the pleats. You'll need worsted weight yarn, a 3.5mm hook, and some fiberfill. By the end, you'll have a cute dumpling that's perfect for play food or a desk buddy.
What you need
Worsted weight yarn
Any brand works. About 20 yards is enough. Choose a light color so the pleats show.
3.5mm crochet hook
This size matches worsted weight yarn. If you use a different weight, adjust the hook.
Fiberfill
A handful is plenty. You can also use scrap yarn or fabric scraps.
Yarn needle
Optional but handy for weaving in ends.
What You Need to Make a Crochet Dumpling
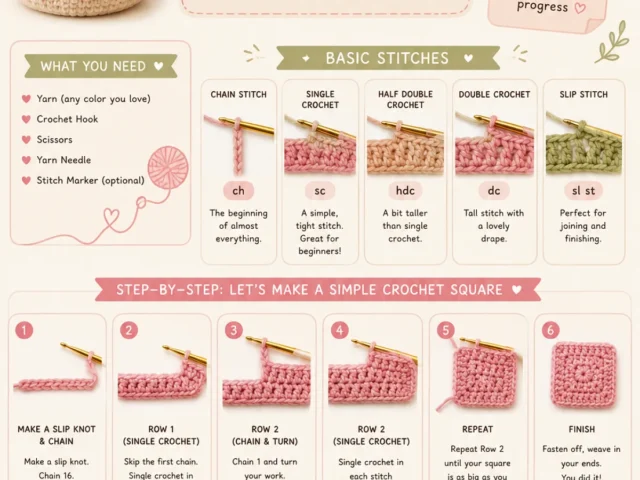
Gather your supplies before you start. You'll need worsted weight yarn in a cream or tan color, a 3.5mm hook, and some fiberfill or scrap yarn for stuffing.
A yarn needle helps to weave in ends, but you can use the hook to pull the yarn through if you're careful.
- Worsted weight yarn (about 20 yards)
- 3.5mm crochet hook
- Fiberfill or scrap yarn
- Yarn needle (optional)
For a softer dumpling, use a larger hook. For a denser one, go down a size.
How to Crochet the Dumpling Body
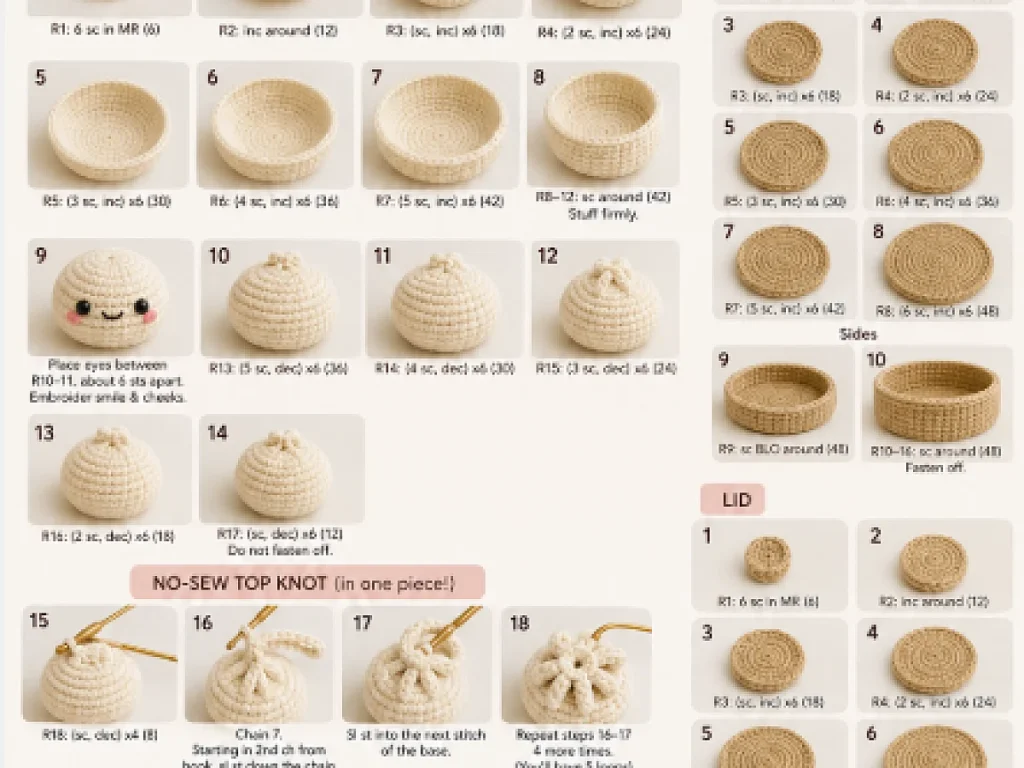
Start with a magic ring, then work six single crochet into it. Pull the ring tight, and slip stitch to join.
Round 2: increase in every stitch (12). Round 3: single crochet in the next stitch, increase in the next, repeat around (18).
Rounds 4-6: single crochet in each stitch around (18). That's the body.
Mark the start of each round with a scrap of yarn so you don't lose your place.
Stuffing and Shaping the Dumpling
Stuff the body firmly with fiberfill. You want it plump but not stretched.
Now flatten the tube so the opening is at the top. Insert your hook through the front loop of the first stitch and the back loop of the stitch opposite it, and slip stitch them together. Repeat across the top to close the seam.
This creates the pleats that make it look like a real dumpling.
If the pleats look uneven, gently pull the yarn to adjust before you fasten off.
How to Finish the Top Pleats
After you close the top, pull the yarn tight and secure it with a knot. Weave in the end.
For the pleats, use your fingers to pinch the top into four or five folds. You can lightly tack them with a stitch if you want them to stay put.
That's it. Your dumpling is done.
To make the pleats more defined, use a contrasting color to whip stitch along the folds.
Ways to Make It Your Own
Once you've made one, you'll want to try variations. Here are a few ideas to change the look.
- Add a face with embroidery thread for a kawaii dumpling.
- Use pastel colors for a dessert dumpling.
- Make a tiny one with fingering weight yarn for a keychain.
- Stuff with a jingle bell for a baby toy.
Step
Make the Magic Ring
Wrap yarn around your finger, chain 1, and work 6 single crochet into the ring. Pull tight.
Increase to 18 Stitches
Round 2: increase in every stitch (12). Round 3: single crochet in next, increase, repeat (18).
Work Even Rounds
Rounds 4-6: single crochet in each stitch around (18). Your piece should look like a small cup.
Stuff the Body
Fill with fiberfill until it's firm but not overstuffed.
Close the Top
Flatten the opening, then slip stitch across the top through both layers to seal. Pull tight.
Shape the Pleats
Pinch the top into folds and secure with a few stitches if needed. Weave in ends.
Ways to change it
Kawaii Face
Embroider a simple smiley face with black thread for a cute character.
Mini Version
Use fingering weight yarn and a 2.25mm hook to make a tiny dumpling for a keychain.
Dessert Dumpling
Use pastel pink or mint green yarn and add a little cherry on top.
Baby Rattle
Put a small jingle bell inside before closing. Great for little hands.
The short version
- The pattern uses only chain, single crochet, and slip stitch.
- You close the top by slip stitching across the opening, which creates the pleats.
- The whole project takes about 20 minutes.
- Use worsted weight yarn and a 3.5mm hook for the best result.
- You can adjust the size by changing yarn weight and hook size.
- Add a face or a bell to make it your own.
Questions people ask
How do I make the pleats look neat?
Pinch the top into folds before sewing them down. Use a contrasting thread to tack them in place if needed.
Can I use a different yarn?
Yes, any yarn works, but you'll need to adjust the hook size. Thicker yarn makes a bigger dumpling.
Is this pattern good for beginners?
Absolutely. You only need basic stitches, and the shaping is simple.
Grab your hook and make a few for your friends
Now you have a cute, squishy dumpling in about twenty minutes. Make a few to keep or give away. They're perfect for play food or just to smile at. Keep it quick and cute!