Amigurumi Tutorial: How to Crochet a Cute Little Bunny
Crochet a tiny bunny in under an hour with this step-by-step guide.
You can crochet a tiny bunny in about 45 minutes, even if you've only made a few granny squares.
Amigurumi is just crocheting small stuffed toys. The name comes from Japanese, but the craft is the same everywhere. You work in a spiral, stuff as you go, and sew the parts together. It sounds harder than it is.
This bunny is a good first project. It uses only single crochet, increases, and decreases. You'll make the body and head as one piece, then add ears and a tail. No fancy stitches, no complicated shaping.
This tutorial shows you how to crochet a classic amigurumi bunny using worsted-weight yarn and a 3.5mm hook. You'll learn the basic stitches, how to work in the round, and how to assemble the pieces. By the end, you'll have a small bunny about 4 inches tall.
What you need
Worsted weight yarn
About 50 yards. Acrylic is fine and cheap. Light colors make stitches easier to see.
3.5mm crochet hook
If your yarn is thicker, use a 4mm. If thinner, use a 3mm. The goal is a tight fabric that hides stuffing.
Polyester stuffing
A small bag is plenty. You can use scraps of yarn or fabric in a pinch.
Yarn needle
For sewing parts together and weaving in ends. A blunt tip is safer.
Scissors
Any small scissors work.
What You Need for Amigurumi
Gather your supplies before you start. You'll need worsted-weight yarn (about 50 yards), a 3.5mm hook, a yarn needle, scissors, and polyester stuffing. Optional: safety eyes or black embroidery thread for the face.
Choose a light-colored yarn for your first bunny. Dark yarn makes it hard to see your stitches. Acrylic yarn works fine and is cheap. If you have cotton yarn, that works too, but it's less forgiving.
- Worsted weight yarn (about 50 yards)
- 3.5mm crochet hook
- Yarn needle
- Scissors
- Polyester stuffing
- Safety eyes (optional) or black embroidery thread
Use a stitch marker to mark the start of each round. A scrap of contrasting yarn works as a marker.
Stitches You'll Use
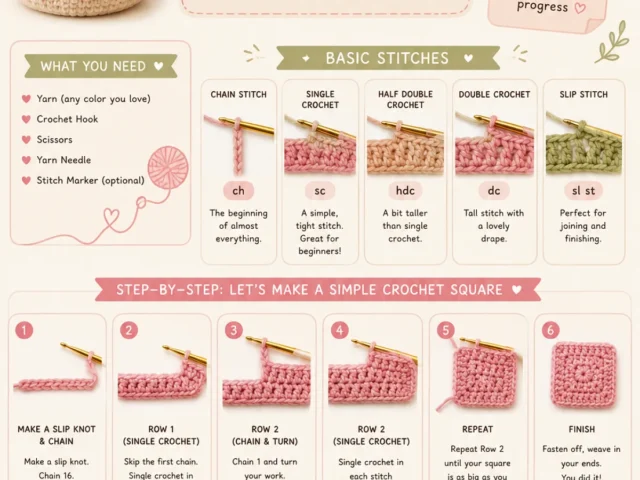
You only need three stitches: chain, single crochet, and slip stitch. If you can make a chain and a single crochet, you're ready.
Single crochet is the workhorse. You'll do it over and over. Increases are two single crochets in the same stitch. Decreases are single crochet two together, which pulls the fabric in.
- ch: chain
- sc: single crochet
- inc: increase (2 sc in one stitch)
- dec: decrease (sc two together)
- sl st: slip stitch
Keep your tension even. If your stitches are too tight, the hook will be hard to insert. Too loose, and stuffing will show through.
How to Crochet the Body and Head
Start with a magic ring. If you don't know that, chain 2 and work 6 sc into the second chain from the hook. Pull the tail to close the hole.
Work in a spiral. Don't join rounds unless the pattern says so. Just keep going around. Place your marker at the start of each round.
Increase every round until you have 30 stitches. Then work even for several rounds. That makes the body. Then start decreasing to shape the head and close the top. Stuff it firmly before the hole gets too small.
- Round 1: 6 sc in a ring (6)
- Round 2: inc in each stitch (12)
- Round 3: sc in next stitch, inc, repeat (18)
- Round 4: sc in next 2 stitches, inc, repeat (24)
- Round 5: sc in next 3 stitches, inc, repeat (30)
- Rounds 6-10: sc in each stitch (30)
- Round 11: sc in next 3 stitches, dec, repeat (24)
- Round 12: sc in next 2 stitches, dec, repeat (18)
- Round 13: sc in next stitch, dec, repeat (12)
- Round 14: dec in each stitch (6)
- Fasten off and weave in the end.
Stuff the body firmly but not rock-hard. You want it to feel squishy, not like a baseball.
How to Crochet the Ears and Tail
Ears are simple. Chain 8, then single crochet back and forth for 10 rows. Fold each ear in half lengthwise and sew the edges together to make a pointed ear.
Make two ears. The tail is a small ball. Start with a magic ring, increase to 12 stitches, work even for a few rounds, then decrease to close. Stuff it lightly.
- Ear pattern: ch 8, sc in 2nd ch from hook and across (7), turn. Repeat for 10 rows.
- Tail: 6 sc in ring, inc each (12), sc even for 2 rounds, dec each (6), fasten off.
For a longer ear, chain 10 instead of 8. For a shorter ear, chain 6.
How to Assemble the Bunny
Sew the ears to the top of the head, about 3 stitches apart. Position them so they stand up or flop over, your choice.
Sew the tail to the back of the body, opposite the face. Use the yarn needle and the same yarn to stitch it on securely.
Add the face. If you use safety eyes, push them through before stuffing. If you embroider, use black thread and a few stitches for eyes and a nose. Keep the face simple.
Pin the ears in place before sewing. That way you can step back and check the position.
Common Mistakes and How to Fix Them
The most common mistake is losing count. If you miss an increase, your circle will look like a bowl instead of a flat disc. Count your stitches at the end of each round.
Another mistake is stuffing too early. If you stuff before the head is shaped, you'll have trouble decreasing. Wait until the pattern says.
If your fabric has holes, your tension is too loose. Try a smaller hook, like 3.25mm, or tighten your grip.
If you make a mistake, don't be afraid to rip it out. It's faster to fix than to continue with a wonky bunny.
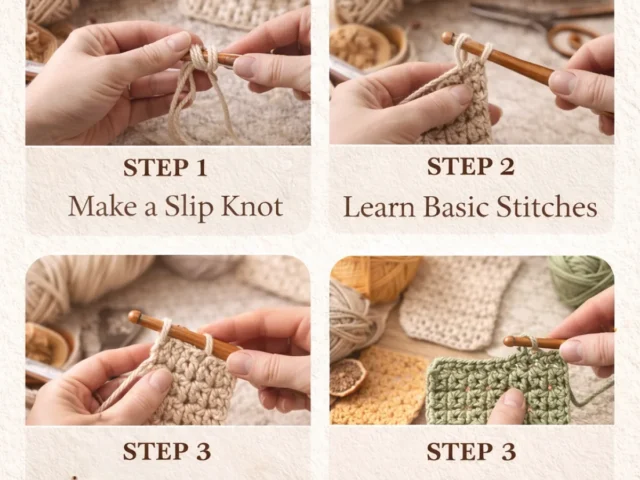
Step
Make the magic ring
Wrap yarn around your finger, insert hook, pull up a loop, chain 1, then work 6 sc into the ring. Pull the tail to close.
Shape the body
Increase to 30 stitches as described. Work even for 5 rounds to form the body. Then start decreasing.
Stuff the body
Before the hole gets too small, stuff firmly. Keep the shape round, not lumpy.
Close the head
Continue decreasing until you have 6 stitches. Fasten off and weave in the end.
Crochet the ears
Make two rectangles, fold, and sew the edges to form pointed ears.
Make the tail
Crochet a tiny ball and stuff it lightly.
Sew the parts
Attach ears to the head, tail to the back, and add a simple face.
Ways to change it
Bigger bunny
Use bulky yarn and a 5mm hook. It will be about 7 inches tall.
Different ears
Make long floppy ears by chaining 12 and working fewer rows.
Add clothes
Crochet a tiny scarf or bow to dress it up.
Use cotton yarn
Cotton is stiffer and holds shape well, but it's less stretchy.
Make a bear
Skip the long ears and use small round ears instead. Change the face to a bear muzzle.
The short version
- Use worsted-weight yarn and a 3.5mm hook for the best size.
- Work in a continuous spiral, marking the start of each round.
- Count your stitches every round to avoid shaping mistakes.
- Stuff firmly before the hole closes.
- Sew ears on after the body is done, so you can adjust position.
- A simple embroidered face is easier for beginners than safety eyes.
- Practice makes perfect; the second bunny will be neater.
Questions people ask
What is amigurumi?
Amigurumi is the Japanese art of crocheting small stuffed toys. You work in the round to create shapes, then stuff them. It's a popular craft for making cute animals and characters.
How long does it take to make an amigurumi bunny?
For a beginner, it might take an hour or two. Once you know the stitches, about 45 minutes. The time depends on your speed and how many times you rip out mistakes.
What yarn is best for amigurumi?
Worsted weight cotton or acrylic yarn is best. Cotton is smooth and holds shape, but acrylic is cheaper and softer. Avoid fluffy yarns because they hide stitches.
Why does my amigurumi have holes?
Holes happen when your tension is too loose. Try a smaller hook, like 3mm, and keep your stitches tight. Also, make sure you're not accidentally skipping stitches.
Ready to crochet your own bunny?
Now you have a little bunny to keep or give away. The more you make, the faster you'll get. Try different colors and sizes. Keep it quick and cute!