
How to Crochet a Colorful Elephant Figurine: A Step-by-Step Guide
Learn to crochet a small, colorful elephant with a curled trunk, big teal ears, and striped legs—a perfect gift for a nursery shelf or animal collection.
A tiny elephant with a curled trunk and striped legs can sit on a nursery shelf or in the palm of your hand, and you can crochet it in a weekend.
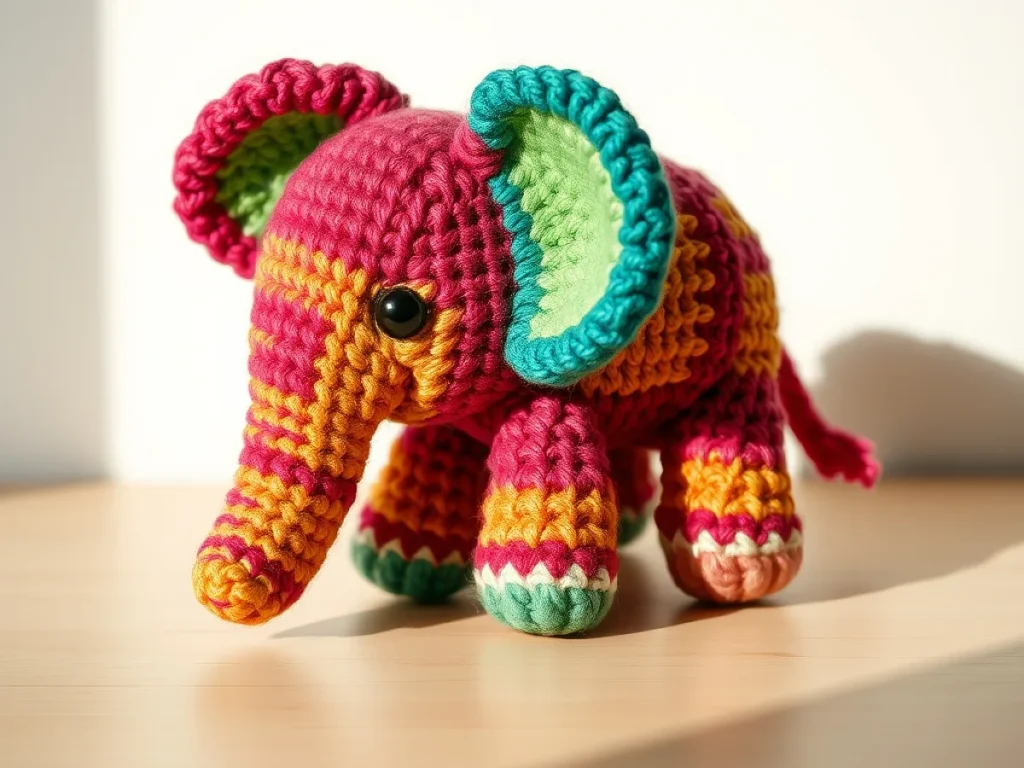
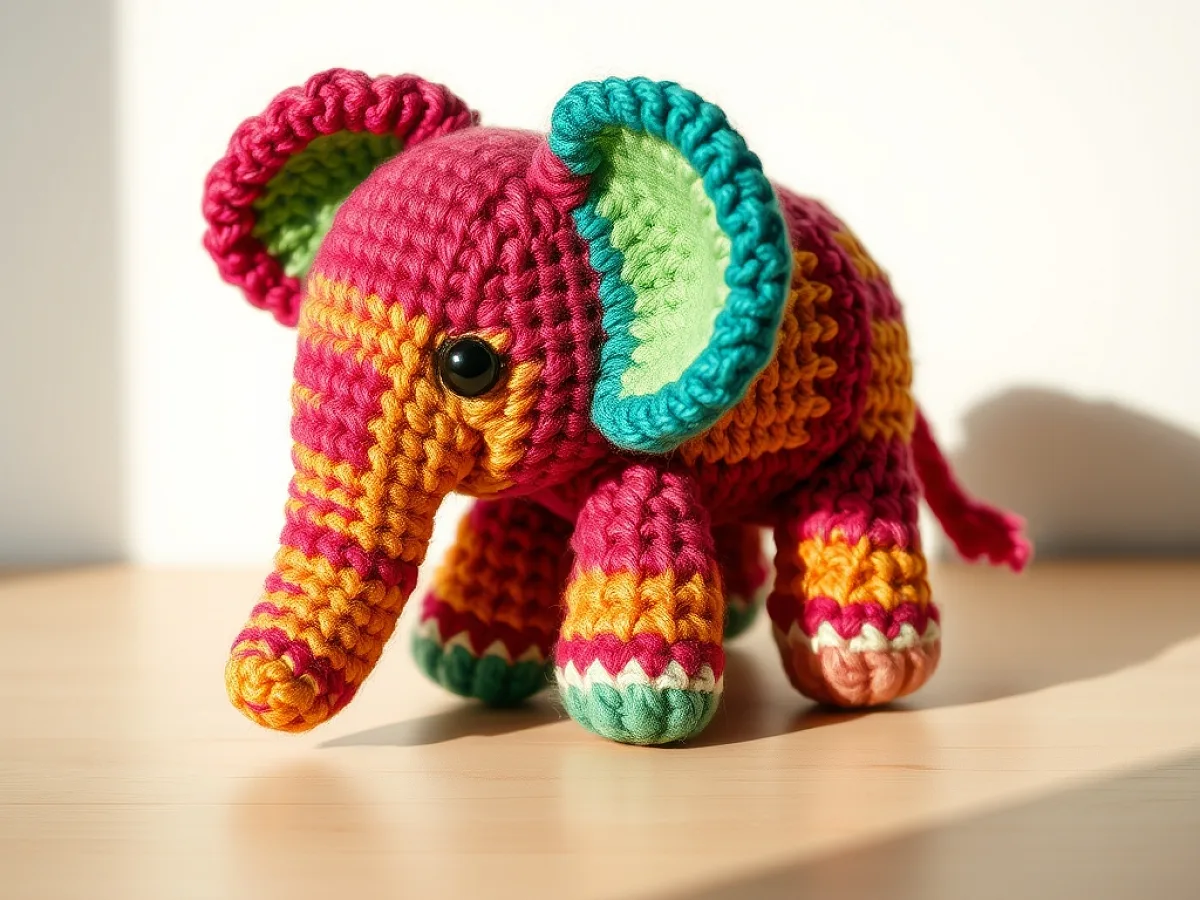
The elephant in the photo has a curled trunk, big teal ears, and legs striped in bright colors. It looks like a toy, but it's also a display piece—small enough to hold, sturdy enough to stand on a shelf.
The whole project uses basic amigurumi skills: working in the round, increasing and decreasing, and sewing parts together. If you can make a simple ball, you can make this elephant.
This guide walks you through crocheting a colorful elephant figurine, from gathering supplies to finishing touches. You'll learn the stitches, assembly order, and how to fix common mistakes like lopsided ears or a trunk that won't curl.
What You Need
Worsted weight yarn (weight 4)
Cotton or cotton-acrylic blend. You need small amounts in several colors: main color, teal for ears, and two or three stripe colors.
Crochet hook size 3.5 mm (E)
Or adjust to get a tight gauge. A 3.25 mm hook works if your tension is loose.
Stuffing
Polyester fiberfill is easy to find and washes well. Use a small amount for the trunk and legs, more for the head and body.
Yarn needle
For sewing parts together and weaving in ends. A bent-tip needle makes it easier.
Stitch markers
To keep track of rounds, especially when working in a spiral.
Safety eyes (optional)
8 mm size works for a 6-inch elephant. If you prefer, embroider the eyes with black yarn instead.
What Yarn and Hook Should You Use?
For a figurine about 6 inches tall, choose a worsted weight yarn (weight 4). Cotton or a cotton-acrylic blend holds its shape well and shows stitch definition clearly. Acrylic is softer and cheaper, but it can pill over time.
A 3.5 mm (E) hook works well with worsted weight yarn for a tight fabric. Tight stitches keep the stuffing from showing through. If you crochet loosely, try a 3.25 mm hook instead.
You'll need small amounts of several colors: a main color for the body, a contrasting color for the ears (teal in the photo), and two or three colors for the leg stripes. Scraps from other projects are perfect.
Before you start, make a gauge swatch in the round. Crochet 10 sc in a circle and measure the diameter. Adjust your hook if the fabric feels too loose or too stiff.
How Do You Read the Pattern?
The pattern uses standard amigurumi abbreviations: ch for chain, sc for single crochet, inc for increase (two sc in one stitch), dec for decrease (invisible decrease is best). You'll work in a continuous spiral, so use a stitch marker to track the start of each round.
Each part is made separately: head, body, four legs, two ears, a trunk, and a tail. Then you sew them together. The order matters because you need to attach the trunk and ears before closing the head completely.
The finished elephant is about 6 inches tall and 4 inches wide, not counting the trunk. The exact size depends on your yarn and hook.
Write down the round numbers on a small piece of paper and check them off as you go. It's easy to lose count when you're working in a spiral.
Crocheting the Head and Body
Start with the head. Make a magic ring, then increase evenly until you have a flat circle about 2.5 inches across. Then work even rounds to form a ball. The head needs to be slightly oval, so add a few extra increases on one side.
For the body, make a similar ball but a bit larger. You can stuff both parts firmly, but not so much that the stitches stretch. The body should be able to sit flat on its own.
Before you close the head, attach the trunk and ears. Position the trunk centered on the face, pointing downward. The ears go on the sides, slightly behind the eyes. Use pins to hold them in place before sewing.
To make an invisible decrease, insert your hook into the front loop of the next two stitches, yarn over, and pull through both loops. This hides the decrease and keeps the surface smooth.
Making the Trunk and Ears
The trunk is a simple tube. Chain 6 and join to form a ring, then crochet in the round for about 8 rows. To make it curl, crochet the last few rows with decreases on one side only. That makes the trunk curve naturally.
The ears are flat circles with a contrasting color. Make two circles about 2.5 inches in diameter, then fold them slightly and sew them to the head. The fold gives them a cupped shape that looks like real elephant ears.
For the trunk to curl nicely, don't stuff it too much. A light stuffing or none at all lets it bend. You can also shape it with your fingers after sewing.
If your trunk doesn't curl enough, add a few more decreases on one side. If it curls too much, undo the last row and add a plain round.
Striped Legs and Assembly
Each leg is a tube that starts with a magic ring. Work in the round, changing colors every two or three rows to create stripes. Make the leg about 2 inches long, then stuff it lightly.
To attach the legs, position them under the body so the elephant can stand. Sew them on with a long yarn needle, using the same color yarn as the body. Make sure the legs are even so the elephant doesn't wobble.
Sew the head to the body at a slight angle, so the trunk points forward. Then add the tail: a chain of 8, with a small knot at the end. Attach it to the back of the body.
When sewing parts together, use the yarn tail from the part you're attaching. It's stronger and hides the knot inside the piece.
Adding the Face and Final Details
For the eyes, you can use safety eyes or embroider them with black yarn. Safety eyes are easier and give a polished look. Place them about 6 stitches apart, between the trunk and the ears.
If you embroider, make a small cross stitch or use French knots. Embroidered eyes are safer for a baby toy, but the figurine is for display, so either works.
Add a little blush on the cheeks with pink yarn or fabric paint. This gives the elephant a sweet expression. Then weave in all loose ends and trim.
To make the elephant stand better, flatten the bottom of the body before stuffing. You can also sew a small weighted disc inside the body, like a plastic circle, to lower the center of gravity.
Step
Make the magic ring and head
Start with a magic ring and crochet 6 sc into it. Increase evenly each round until the circle is about 2.5 inches wide. Then work even rounds to form a ball. Stuff it lightly and set aside.
Crochet the body
Make a similar ball but slightly larger. Increase to about 3 inches wide, then work even rounds for the height. Stuff firmly and close the opening, leaving a tail for sewing.
Create the trunk
Chain 6 and join to form a ring. Work 8 rounds of sc. On the last 2 rounds, decrease on one side only to create a curl. Leave a long tail for sewing.
Make the ears
Crochet two flat circles in teal, about 2.5 inches in diameter. Fold each circle in half and pinch the bottom to shape. Leave a tail for sewing.
Crochet the striped legs
Make four tubes, each about 2 inches long. Change colors every 2 or 3 rows to create stripes. Stuff lightly and leave tails for sewing.
Assemble the elephant
Sew the trunk to the center of the head, pointing down. Attach the ears to the sides. Sew the head to the body. Attach the legs to the bottom of the body, making sure they are even. Add the tail at the back.
Add the face and finish
Attach safety eyes or embroider them. Add a small stitch for the mouth if you like. Weave in all ends and trim. Shape the trunk and ears with your fingers.
Ways to Change It
Smaller elephant
Use fingering weight yarn and a 2.25 mm hook. The elephant will be about 3 inches tall.
Different ear colors
Instead of teal, try pastel pink, mint green, or a contrasting color that matches your nursery theme.
Striped body
Work the body in stripes too, matching the legs. This creates a more playful look.
Baby-safe version
Skip the safety eyes and embroider them instead. Use a soft cotton yarn and avoid any small parts.
Standing elephant
Make the legs longer and the body more upright, so the elephant stands on four legs like a real one.
The Short Version
- Use a tight gauge to prevent stuffing from showing through.
- The trunk curls naturally when you decrease on one side only.
- Ears are flat circles folded in half to give a cupped shape.
- Attach the trunk and ears before closing the head for a secure fit.
- Striped legs are made by changing colors every few rounds.
- Weigh the elephant down with a plastic disc inside the body to help it stand.
- Embroidered eyes are safer for a baby toy, but safety eyes look polished for display.
Questions People Ask
What size hook should I use for a colorful crochet elephant figurine?
A 3.5 mm (E) hook works well with worsted weight yarn. If you crochet loosely, try a 3.25 mm hook to get a tight fabric that hides the stuffing.
How do I make the elephant trunk curl?
After crocheting a tube for the trunk, work a few rows with decreases on one side only. That makes the trunk curve naturally. Don't stuff it too much, or it will stay straight.
Can I use acrylic yarn instead of cotton?
Yes, acrylic is fine. It's softer and cheaper, but it may pill over time. Cotton holds its shape better and shows stitch definition clearly.
How long does it take to crochet this elephant?
Most people finish in 6 to 8 hours, depending on your speed. If you're new to amigurumi, it might take longer.
How do I make the elephant stand up?
Make sure the legs are even and the body is weighted. You can sew a small plastic disc inside the body to lower the center of gravity.
Try this pattern and share your colorful elephant
With a few colors and basic stitches, you can make an elephant that looks like it came from a storybook. The key is to keep your tension even and take your time with the assembly. Once you finish, you'll have a cheerful figurine that brings a smile to any room. Stitch with ease.



