Amigurumi Pattern Library Graphic Design: How to Lay Out a Crochet Pattern Collection
Build a pattern library where a stranger can find the bear pattern, read the yarn weight and hook size, and start crocheting in under a minute.
A pattern page that hides the yarn weight and hook size three scrolls down will lose the reader before the first round.
An amigurumi pattern library is not a gallery of finished bears. It is a set of pages built on the same grid, so the second pattern is as easy to read as the first.
Most library pages fail for one boring reason: the numbers a crocheter needs are scattered. Yarn weight sits in a paragraph, hook size sits in a photo caption, and the stitch count shows up in round four with no total. Move those facts into fixed slots and the design problem mostly solves itself.
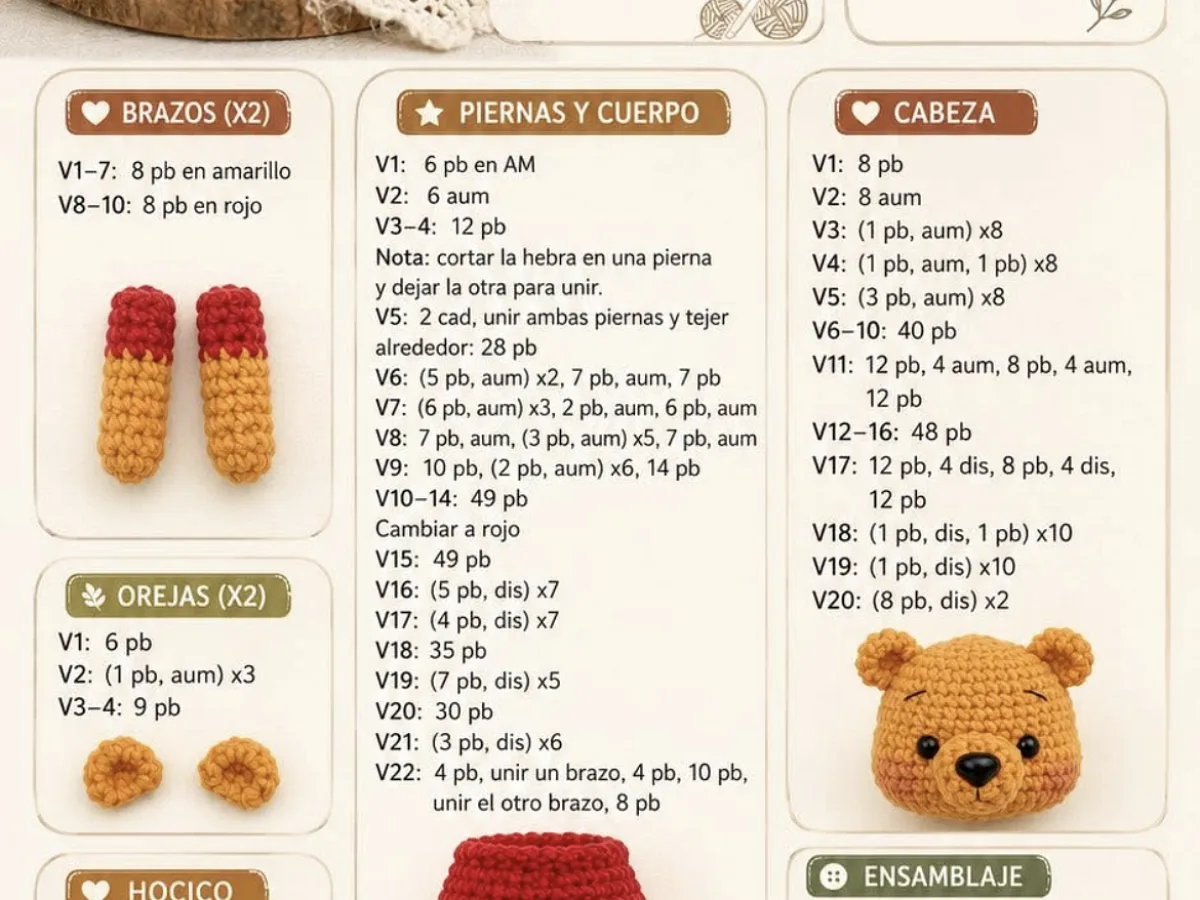
Graphic design for an amigurumi pattern library means one repeatable page layout for every pattern: photo, skill level, yarn weight, hook size, gauge, stitch count, finished size, abbreviations, then the rounds in order. Same order every time, so a reader learns where to look.
What you need
Layout tool
Any page builder or design app that lets you set a fixed text width and save a template. A free one is fine.
Body font
A clean sans-serif at 16 px or larger. Two weights, regular and bold, are enough.
Phone for photos
Daylight near a window, shot straight on. No flash.
Yarn and hook for swatching
DK cotton with a 2.5 mm hook is the common amigurumi pairing. Use what your pattern calls for.
Stitch marker
One per piece in progress. A scrap of contrasting yarn works.
What belongs in an amigurumi pattern library page
Every page needs the same eight facts before the first round: skill level, yarn weight, hook size, gauge, finished size, stitch count, abbreviations and the order of construction. Put them in a box at the top, not in the body text. A reader checks that box, decides whether they own the right yarn, and either starts or leaves. Both outcomes are fine.
The box should read like a label, not a sentence. Write "DK cotton, 2.5 mm hook, 6 sc per 2.5 cm" instead of "this pattern works up nicely in a light cotton yarn." Numbers are what people scan for.
Keep the box to one screen on a phone. If it runs longer than about six lines, you are explaining instead of listing.
Set the fact box in the same place on every page. Readers stop hunting after the second pattern.
Choosing a grid and type size that survives a phone screen
A single column about 60 to 70 characters wide is the safest layout. Two columns look tidy on a laptop and turn into a zigzag on a phone.
Body text at 16 px minimum. Round instructions at 17 or 18 px, because people read them with yarn in one hand and a phone propped on a knee. Line spacing around 1.5 keeps the eye from jumping lines mid-round.
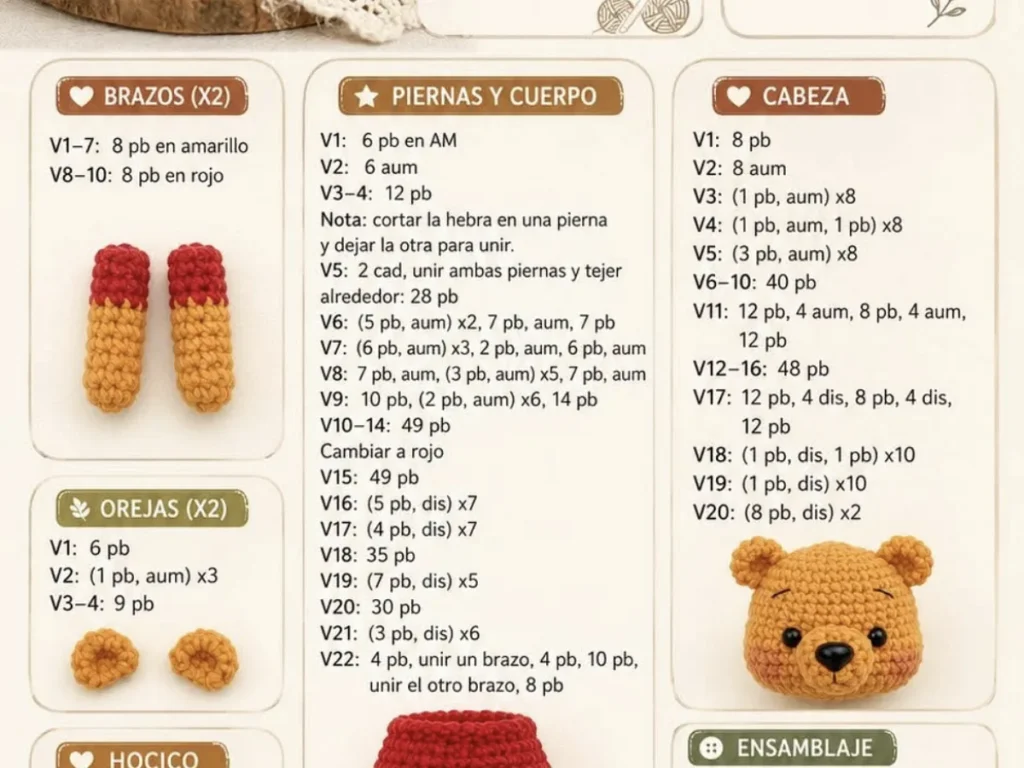
Number every round on its own line. A block of running text with rounds buried inside it is the most common layout mistake in free amigurumi patterns, and it is the one readers complain about most.
Test the page at 360 px wide before you publish. If a round wraps to three lines, shorten the wording.
Photography and diagram rules for crochet patterns
One hero photo of the finished piece, shot straight on, plus one close-up of the face or join. That is enough for most amigurumi. A photo taken at an angle hides the shape of the head, which is the part people judge first.
If you add charts, keep the symbol set consistent across the whole library. A chart that uses a filled dot for one stitch on page one and a cross for the same stitch on page four costs the reader more time than it saves.
Label every photo with what it shows. "Head after round 12" tells a crocheter more than "progress shot."
Shoot in daylight near a window. A phone camera at 2.5 cm from the piece beats a dim indoor shot with a flash.
Writing the construction order so it can be followed
Amigurumi is usually built in pieces: head, body, limbs, ears, then assembly. List the pieces in the order they are made and say how many of each. "Make two arms" is clearer than "arms."
Give the finished size before the first round, not after. A reader needs to know whether the bear ends up 12 cm or 30 cm tall before choosing yarn.
State the joining method plainly. Most amigurumi pieces are sewn on with the same yarn and a blunt needle, and the seam should sit at the back. If you use a different method, say so at the top of the assembly section rather than in a note at the bottom.
Write the assembly instructions as if the reader has already closed the tab with the photos. They often have.
Abbreviations and stitch counts that stay consistent
Use the standard set: sc for single crochet, inc for increase, dec for decrease, sl st for slip stitch, ch for chain, and mr for magic ring. Spell each one out once at the top of the page, then use the short form.
Give the stitch count at the end of every round that changes. Round 3 that goes from 12 to 18 stitches should end with a bracket reading 18. Without it, a missed increase shows up six rounds later as a lopsided head.
Invisible decrease matters in amigurumi. A standard decrease leaves a small bump that shows on the finished face, so most patterns ask for the invisible version. Say which one you mean.
If a round does not change the count, write "sc in each st around" and skip the number. Repeating the same figure adds noise.
Common errors and how to spot them
The most frequent mistake is working the first round into the magic ring too tightly. Pull the tail gently, not hard, and the ring stays open enough to work into. If the centre puckers, the ring was closed before the first round was finished.
Second is a shifted seam. When the start of each round drifts to one side, the head twists and the face sits off-centre. Move the marker back one stitch every few rounds, or work in continuous rounds with a marker at the first stitch.
Third is gauge drift. A 2.5 mm hook with DK cotton usually gives about 6 single crochet to 2.5 cm. If you get 7, the finished piece comes out noticeably smaller than the stated size, and the sewn-on limbs will not line up.
Measure your first ten stitches against a ruler before you commit to the whole piece. It takes thirty seconds.
Keeping the library consistent as it grows
Save one blank page as a template. Every new pattern starts from that file, so the fact box, heading sizes and photo widths never drift.
Name files so you can find them: bear-dk-2.5mm-v2 rather than final-final. When you have twenty patterns, the file names are the index.
Review the whole library twice a year. Check that hook sizes, abbreviations and photo styles still match. A library with three different symbol sets is three small libraries wearing one coat.
Keep a one-page style sheet listing your type sizes, photo widths and abbreviation choices. It saves an hour on every new pattern.
Step
Set the fact box
Place skill level, yarn weight, hook size, gauge, finished size, stitch count and abbreviations in a fixed block at the top. Keep it to six lines.
Pick the column width
One column, 60 to 70 characters. Check it at 360 px wide. If a round wraps to three lines, cut words.
Write the rounds one per line
Number every round and put the stitch count in brackets at the end of any round that changes. This is the step readers notice most.
Add two photos
One straight-on shot of the finished piece, one close-up of the face or join. Label both.
Write the assembly order
List the pieces, how many of each, and the joining method. Say where the seam sits.
Save it as the template
Duplicate the finished page as the blank for the next pattern so nothing drifts.
Ways to change it
Beginner version
Printable version
Chart-only version
Multi-size version
Colour variation page
The short version
- Put yarn weight, hook size, gauge and finished size in a fixed box at the top of every page.
- One column at 60 to 70 characters wide beats two columns on a phone.
- Number every round on its own line and give the stitch count in brackets when it changes.
- Invisible decrease keeps the finished face smooth; say which decrease you mean.
- A 2.5 mm hook with DK cotton usually gives about 6 single crochet to 2.5 cm.
- Save one blank page as a template so the library stays consistent as it grows.
Questions people ask
What is the best hook size for amigurumi?
Most amigurumi uses a hook one or two sizes smaller than the yarn label suggests, so the fabric stays tight and the stuffing does not show. DK cotton with a 2.5 mm hook is a common pairing. Check your own gauge before starting.
How do I stop my amigurumi from looking lumpy?
Two things usually cause it. Stuffing added in one go at the end, and a standard decrease that leaves bumps. Add small amounts of stuffing as you close each piece, and use the invisible decrease where the pattern calls for it.
Should I put the pattern in a chart or in writing?
Written rounds suit most readers, especially beginners. Charts work well for people who already read symbols. You can offer both, but keep the symbols identical across every pattern in the library.
How wide should a pattern page be on a phone?
One column, about 60 to 70 characters, body text at 16 px or larger. Test at 360 px wide. If a single round wraps to three lines, the wording is too long.
How do I keep twenty patterns looking like one library?
Start every pattern from the same saved template and keep a one-page style sheet listing your type sizes, photo widths and abbreviations. Review the whole set twice a year for drift.
Pick your first pattern and build the template around it.
Start with the pattern you know best. Put its yarn weight, hook size, gauge and finished size in a box at the top, number every round, and save the page as your template. The rest of the amigurumi pattern library is just that page, filled in again.