Crochet Tutorial: Make a Sloth Amigurumi Step by Step
Work a palm-sized sloth in single crochet, from the first magic ring to the last arm, in about three evenings.
A sloth made in single crochet takes about four hours of hook time, and most of that is the head.
This is a full written pattern, not a photo gallery. Every round is counted for you, so you always know where you are.
The sloth is small on purpose. Small pieces are easier to hold while you shape the face, and the arms stay short enough that you will not lose track of the rows.
This crochet tutorial walks you through a small amigurumi sloth worked in continuous rounds. You need worsted weight yarn, a 3.5 mm hook, and six basic stitches. The finished toy stands around 11 cm tall and grips a crochet branch with its front arms.
What you need
Worsted weight yarn
Grey for the body, cream for the face, dark brown for the patches. One 100 g ball of grey is more than enough for two sloths.
3.5 mm crochet hook
A hook with a soft grip saves your hand on long rounds. Metal hooks slide faster, bamboo grips the yarn more.
Polyester fiberfill
A bag the size of a loaf of bread will fill several small toys. Do not use cotton wool, it clumps when washed.
Stitch marker
A small safety pin or a loop of contrast yarn works just as well as a bought marker.
Blunt tapestry needle
Blunt, not sharp. A sharp needle splits the yarn and leaves fuzzy ends showing.
Safety eyes, 6 mm
Skip these for a toy for a baby under three. Embroider the eyes in black yarn instead.
What you will need before you start
Gather everything first. Stopping mid-round to hunt for a marker is how stitches get lost.
Worsted weight yarn is the easiest to learn with. Cotton splits less than acrylic, but acrylic shows the stitches better in photos and holds a firmer shape once stuffed.
- Worsted weight yarn in grey for the body, about 40 g
- Worsted weight yarn in cream for the face, about 10 g
- Worsted weight yarn in dark brown for the eye patches and nose, about 5 g
- 3.5 mm hook
- Polyester fiberfill, a small handful
- Stitch marker
- Tapestry needle with a blunt tip
- Two 6 mm black safety eyes, or black yarn if the toy is for a baby
If your yarn is thinner than worsted, drop to a 3 mm hook. If it is thicker, go up to 4 mm. The fabric should be tight enough that you cannot see the stuffing through it.
Abbreviations and how to read the rounds
US terms are used here. Write the list on a sticky note and keep it beside you.
The sloth is worked in a spiral. You do not join rounds and you do not turn. Move your stitch marker to the first stitch of each new round so you can count.
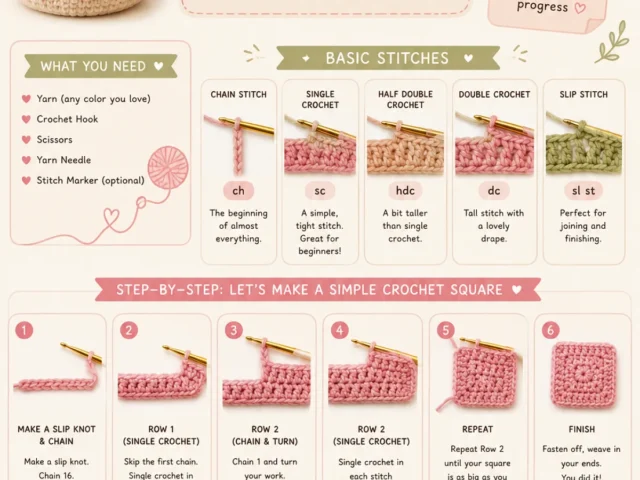
- ch – chain
- sc – single crochet
- sc2tog – single crochet two stitches together, one decrease
- inc – two single crochet in the same stitch, one increase
- sl st – slip stitch
- st – stitch
- MR – magic ring
Count your stitches at the end of every round. If you are one short, undo that round rather than fudging it. One missing stitch in round 4 becomes a lopsided head by round 12.
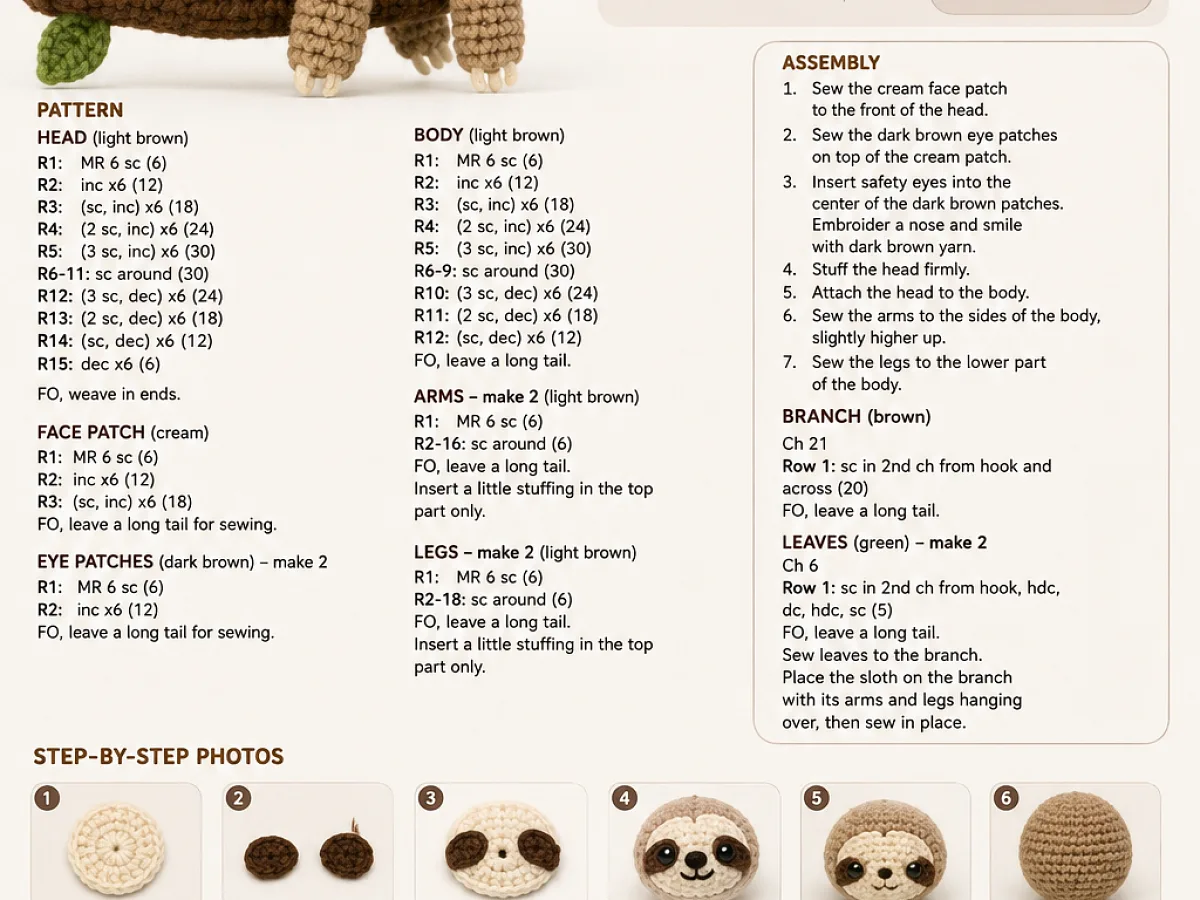
The pattern, round by round
The head and body are one piece. The arms, legs and branch are made separately and sewn on at the end.
Keep your tension loose enough to push the hook through. Amigurumi that is too tight is painful on the hands and hard to stuff evenly.
Stuff as you go. It is much harder to fill a narrow opening once the piece is closed.
Where beginners usually go wrong
The most common mistake is losing the start of the round. Without a marker, you will add an extra stitch and the head will lean to one side.
The second is overstuffing. A head packed too full pushes the stitches apart and the stuffing shows through. Use small pinches, not one big ball.
The third is sewing the arms on too high. Place them one round below the neck line, then look at the toy from the front before you tie off.
If your sloth looks lumpy, pull the stuffing out and put it back in smaller pieces. It almost always fixes the shape.
Test your work before you sew anything on
Hold the head in one hand and squeeze it. It should spring back and stay round, not dent and stay dented.
Lay the two eye patches side by side on the face without pinning them. If they sit level and the gap between them is about two stitches, your placement is right.
Give the body a gentle tug at the base. If you can see gaps between stitches, your hook was too big for that yarn.
Step
Make the head
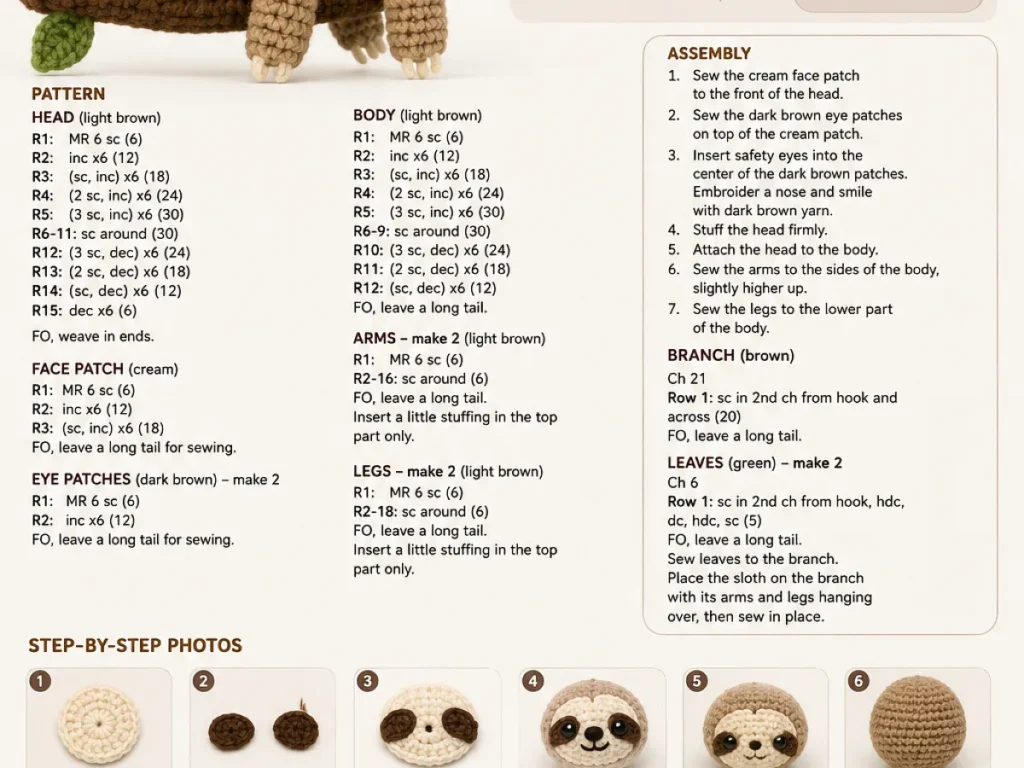
Start with a magic ring and 6 sc into it. Pull the tail tight so the hole closes completely. Increase each round until you reach 36 stitches, then work 5 rounds even. Check the circle lies flat before you continue.
Shape the face
Work 3 decrease rounds, going from 36 down to 18 stitches. Stuff the head firmly now, in small pinches, until it holds its shape when you press it.
Work the body
Continue from the head without cutting the yarn. Work 4 rounds even at 18 stitches, then decrease down to 12. Stuff the body and close the last 6 stitches with a tapestry needle, pulling the tail through the front loops.
Crochet the arms and legs
Make four small tubes, each starting with a magic ring of 5 sc and worked even for 6 rounds. Leave a long tail on each one for sewing. The tubes should be about 3 cm long.
Make the branch
Chain 12, then work 2 rows of sc. Roll the strip into a tight tube and sew the long edge closed. It should be firm enough to hold the sloth's weight without bending.
Add the face
Sew the cream oval onto the front of the head with small stitches. Attach the safety eyes through the dark brown patches, two stitches apart. Embroider a small nose in dark brown just below.
Join everything together
Pin the arms and legs in place, then look at the toy from the front before sewing. Sew each limb with 4 or 5 passes through the same spot so it cannot wobble. Sew the front arms over the branch.
Ways to change it
Baby-safe version
Skip the safety eyes and embroider them in black yarn. Sew every limb with doubled thread so nothing comes loose.
Chunky sloth
Use super bulky yarn and a 6 mm hook. The same pattern makes a toy about 20 cm tall in half the rounds.
Hanging sloth
Leave the branch off and sew a loop of yarn to the top of the head. It hangs from a hook or a shelf edge.
Two-tone sloth
Work the body in light brown and the face in cream. The contrast makes the eye patches stand out more.
Keyring size
Use fine cotton yarn and a 2 mm hook for a sloth about 5 cm tall. Attach a keyring to the top instead of a branch.
The short version
- The head and body are one piece, so there is no seam at the neck.
- A stitch marker is not optional. Without it, rounds blur together and the count drifts.
- Stuff in small pinches. Big lumps make the stitches gape and the filling shows.
- The fabric should be tight enough that you cannot see stuffing through it.
- Sew limbs with several passes through the same spot so they stay put.
- Safety eyes are not for toys given to children under three.
Questions people ask
How long does it take to crochet a small amigurumi sloth?
Plan on about four hours of actual hook time for this size. Most people split it over two or three evenings because the small rounds tire your hands.
Can I make this sloth without a magic ring?
Yes. Chain 2 and work 6 single crochet into the first chain instead. The centre hole will be slightly bigger, so pull your starting tail tight before you stuff the head.
Why can I see the stuffing through my stitches?
Your hook is too big for the yarn, or you are stuffing too firmly. Go down one hook size and add the filling in smaller pieces.
What yarn is best for a first amigurumi?
Worsted weight acrylic is the easiest to learn with. It does not split, it shows the stitch definition clearly, and it holds its shape after stuffing.
How do I stop my sloth's arms from flopping?
Sew them with doubled thread and pass the needle through the same spot four or five times. A single pass always loosens with handling.
Pick up your hook and start the first round
Work the head first and stop when the count reaches 36. If that circle sits flat and round, the rest of the sloth will follow without trouble.