
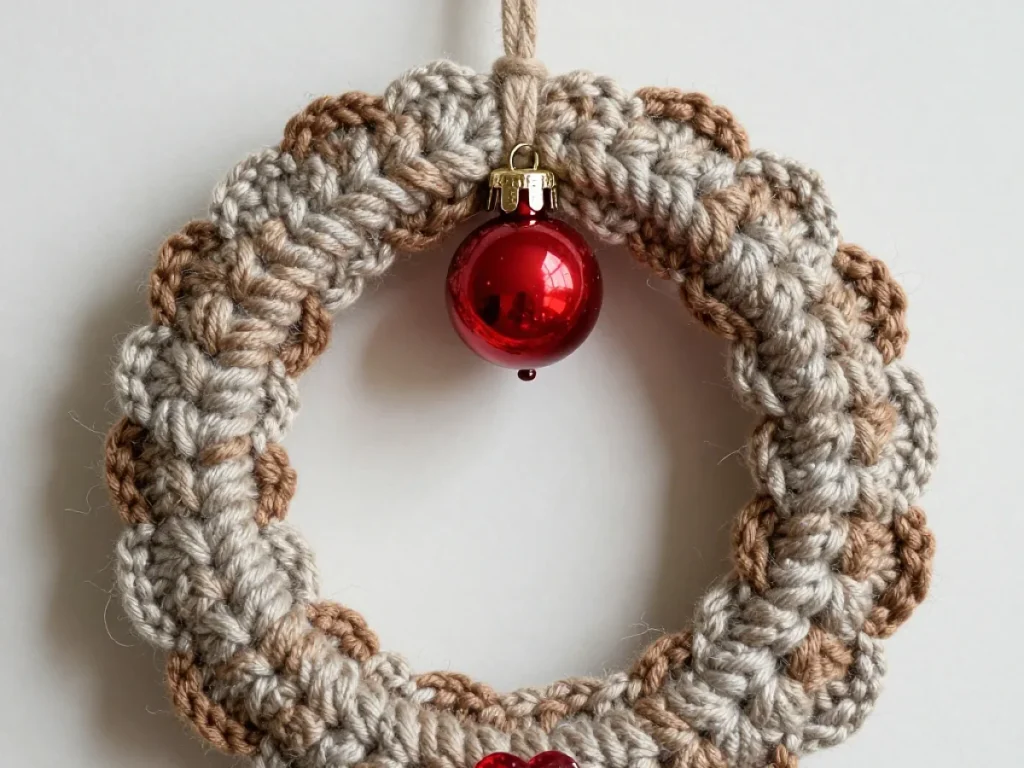
Crocheted Wreath Ornament: A Small Hoop of Holiday Cheer
Make a tiny crocheted wreath ornament with a red bauble to hang on your tree or give as a gift.
A crocheted wreath ornament takes about an hour to make and uses less than 20 yards of yarn.
A crocheted wreath ornament is one of those small projects that gives you a lot of joy for very little work. It uses a tiny amount of worsted-weight yarn, a 4mm hook, and about an hour of your time. The finished piece is about 3 inches across, perfect for a tree, a gift tag, or a zipper pull.
You do not need to be an expert. If you can make a chain and a single crochet, you can make this wreath. The key is working into a ring and then adding a few extra stitches to create the bumpy, leafy look. Let me show you how.
You can crochet a small wreath ornament using basic single crochet and a few simple shaping tricks. This guide walks you through the whole process, from the magic ring to the hanging loop.
What you need
Worsted-weight yarn in green
About 20 yards. Any shade of green works, but medium or dark green shows texture best.
4mm crochet hook
Size G/6. Use a hook that gives a firm fabric.
Red bauble, 1 inch
With a loop or cap. Or use a jingle bell or button.
Yarn needle
For weaving in ends and attaching the bauble.
Stitch marker
Optional but helpful for keeping track of rounds.
What You Need
You will need a small amount of worsted-weight yarn in green. Any shade works, but a medium or dark green shows the texture best. About 20 yards is plenty, so this is a great scrap-buster project.
A 4mm (G/6) crochet hook is a good match for worsted yarn. If you use a different weight, choose a hook that gives you a firm fabric. The wreath should be stiff enough to hold its shape, not floppy.
You also need a red bauble, about 1 inch in diameter, with a loop or cap on top. You can find these at craft stores or reuse one from an old ornament. If you do not have a bauble, a small jingle bell or a button works too.
If you want a softer wreath, use a lighter weight yarn and a smaller hook. Just remember the finished size will be smaller.
How to Read the Pattern
This pattern uses US crochet terms. The stitches you need are chain (ch), slip stitch (sl st), single crochet (sc), and half double crochet (hdc). You will also make a magic ring to start.
The wreath is worked in a spiral, so you do not join rounds. Place a stitch marker at the start of each round to keep your place. The number in parentheses at the end of each round tells you how many stitches you should have.
If you prefer a chart, look below for a simple written diagram of the first few rounds.
If you have never made a magic ring, practice once on a scrap piece of yarn. It is easy to pull tight once you know the trick.
The Pattern Step by Step
Start with a magic ring. Work 6 single crochet into the ring. Pull the tail to close the ring tightly. This forms the center hole. Slip stitch to join, then chain 1 to begin the next round.
Round 2: Work 2 single crochet into each stitch around. You will have 12 stitches. Slip stitch to join, chain 1.
Round 3: Work 1 single crochet in the next stitch, then 2 single crochet in the next stitch. Repeat this pattern around. You will have 18 stitches. Slip stitch to join, chain 1.
Round 4: Work 1 single crochet in each of the next 2 stitches, then 2 single crochet in the next stitch. Repeat around. You will have 24 stitches. Slip stitch to join, chain 1.
Now you will create the bumpy edge. Round 5: Work 1 single crochet in each of the next 3 stitches, then 2 single crochet in the next stitch. Repeat around. You will have 30 stitches. Slip stitch to join, chain 1.
Round 6: Work 1 single crochet in each of the next 4 stitches, then 2 single crochet in the next stitch. Repeat around. You will have 36 stitches. Slip stitch to join and fasten off, leaving a long tail for sewing.
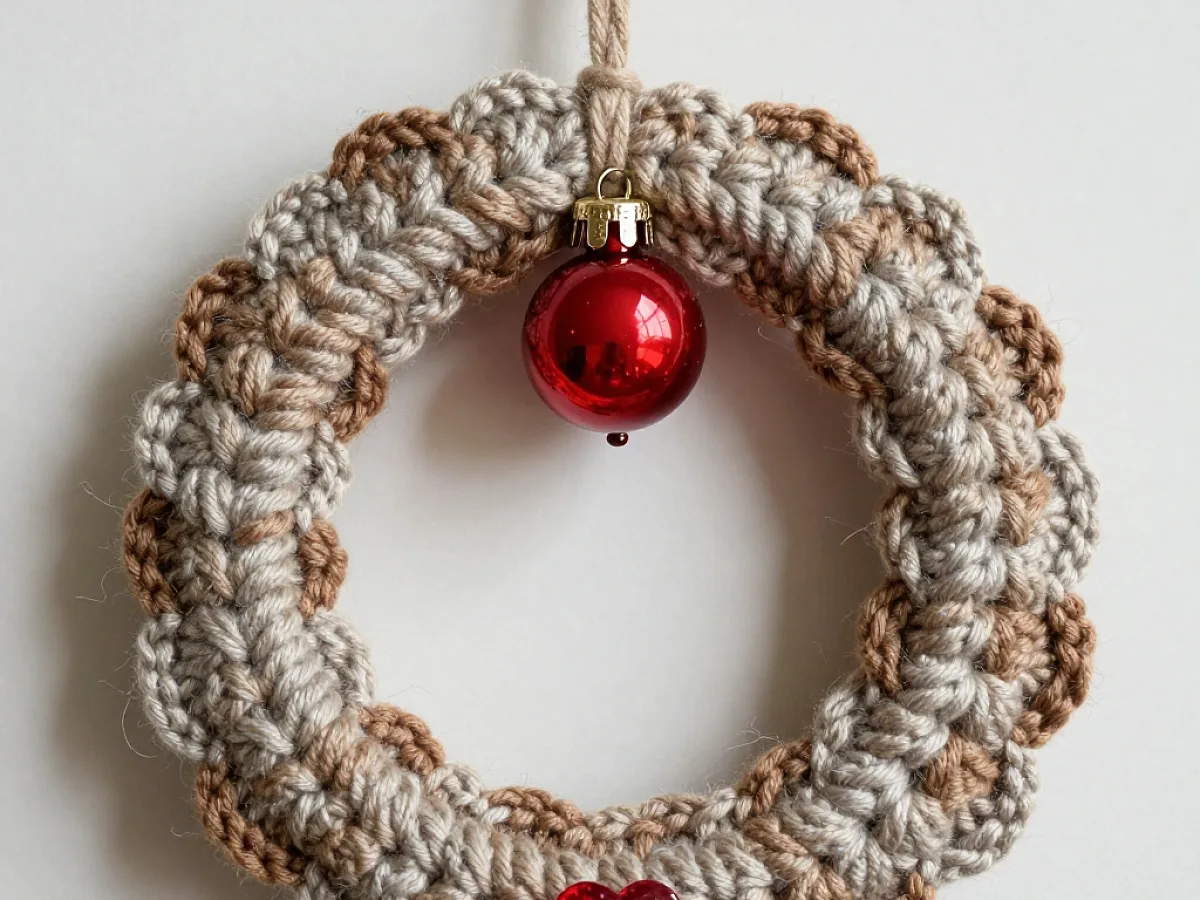
To shape the wreath, fold the circle so the right side is facing out. The increases create gentle ruffles. Use the tail to sew the inner edge to the outer edge at a few points to make a ring. Or, you can simply leave it flat and attach a hanging loop to the top.
If your wreath looks too flat, add an extra round of increases before the last one. If it looks too wavy, skip the last increase round.
Attaching the Bauble
Once your wreath shape is ready, place the red bauble in the center. If the bauble has a wire loop, you can thread it through a stitch in the wreath and twist it closed. If it has a cap, you can sew it in place with a few stitches using the tail from the wreath.
Make sure the bauble is secure but not too tight. You want it to hang straight and not swing too much. If you use a button, sew it on with a needle and thread.
If you want the wreath to lie flat against the tree, attach the bauble to the front and add a separate loop on the back. If you want it to hang as a dangling ornament, put the loop on top and let the bauble hang below.
Finishing and Hanging
To make a hanging loop, chain 12 stitches and slip stitch to the top of the wreath. Fasten off and weave in the ends. Or, use a piece of ribbon or thread and tie it to the wreath.
Weave in all loose ends with a yarn needle. Trim any excess yarn close to the work so it does not show.
Your crocheted wreath ornament is ready to hang. It makes a lovely addition to your tree or a thoughtful handmade gift for someone special.
To keep the wreath looking its best, store it flat in a box when not in use. Avoid crushing it under heavy ornaments.
Step
Make the magic ring
Work 6 single crochet into a magic ring. Pull tight to close.
Increase rounds
Rounds 2-4: increase evenly to reach 24 stitches. Each round adds 6 stitches.
Add the ruffle
Rounds 5-6: continue increasing to create a gentle ruffle. You will have 36 stitches total.
Shape the wreath
Fold the circle and sew the inner and outer edges together at a few points to form a ring.
Attach the bauble
Secure the red bauble in the center using the wire loop or a few stitches.
Add the hanging loop
Chain 12 and slip stitch to the top. Fasten off and weave in ends.
Ways to change it
Color change
Use white or silver yarn for a wintery look, or red for a Valentine's wreath.
Bauble swap
Use a wooden bead or a tiny bell instead of a red bauble.
Size up
Use bulky yarn and a larger hook to make a bigger wreath for a door or wall.
Add a bow
Tie a small ribbon bow at the top of the wreath instead of a hanging loop.
Embellish
Sew on tiny buttons or beads to mimic berries.
The short version
- A crocheted wreath ornament is a quick scrap-yarn project that takes about an hour.
- Use worsted-weight yarn and a 4mm hook for a firm, 3-inch wreath.
- Basic stitches only: chain, single crochet, and slip stitch.
- The magic ring gives a neat, tight center hole.
- Increases in each round create the ruffled, leafy edge.
- Attach a red bauble, bell, or button as the center decoration.
- Add a chain or ribbon loop for hanging.
Questions people ask
What yarn is best for a crocheted wreath ornament?
Worsted-weight cotton or acrylic works well. Cotton holds its shape better, but acrylic is softer and cheaper. Use any green you like.
How do I make the wreath shape?
You crochet a flat circle and then fold it so the increases create a ruffle. Sew the inner and outer edges together at a few points to make a ring.
Can I use a different hook size?
Yes, but the finished size will change. A larger hook makes a bigger, looser wreath; a smaller hook makes a tighter, smaller one.
How do I attach the bauble securely?
If the bauble has a wire loop, thread it through a stitch and twist it closed. If it has a cap, sew through the cap's loop with a few stitches.
Hang your handmade wreath with pride
Now you have a tiny wreath that took almost nothing to make. It is the kind of project you will want to repeat in different colors for every friend on your list. Stitch with ease.



