Free Crochet Pattern: Mint Chocolate Chip Turtle
Crochet a soft, minty turtle with a chocolate shell in one sitting.
The first thing you notice about this turtle is the shell: it's chocolate brown, but the body underneath is cool mint green, like the ice cream.
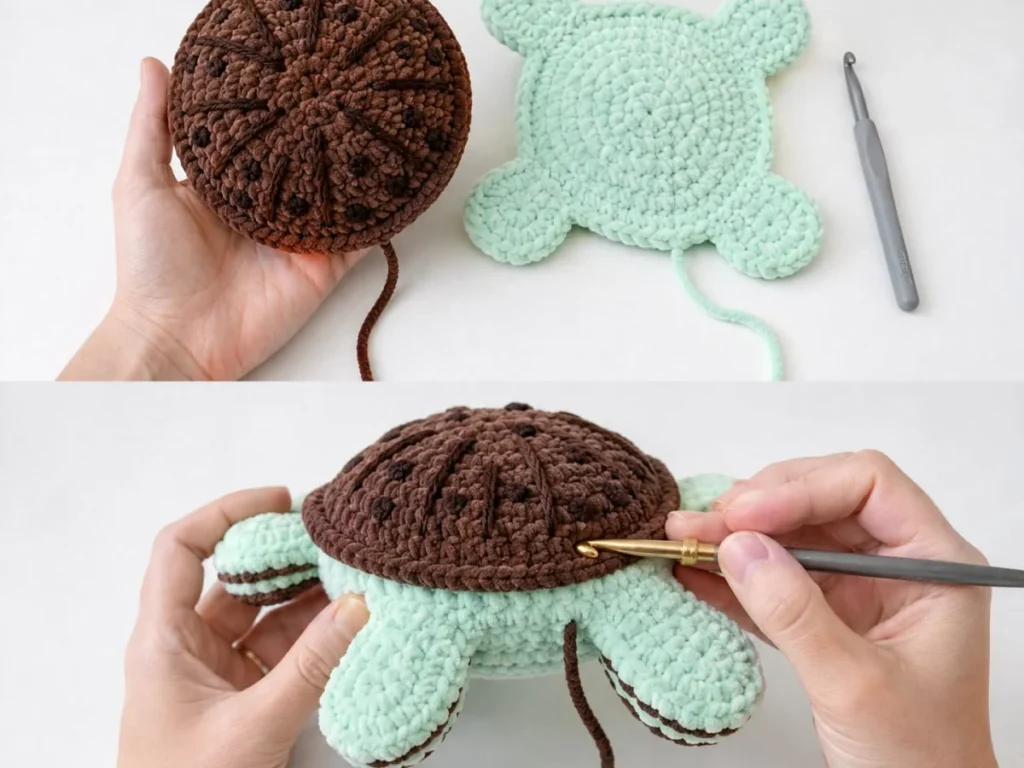
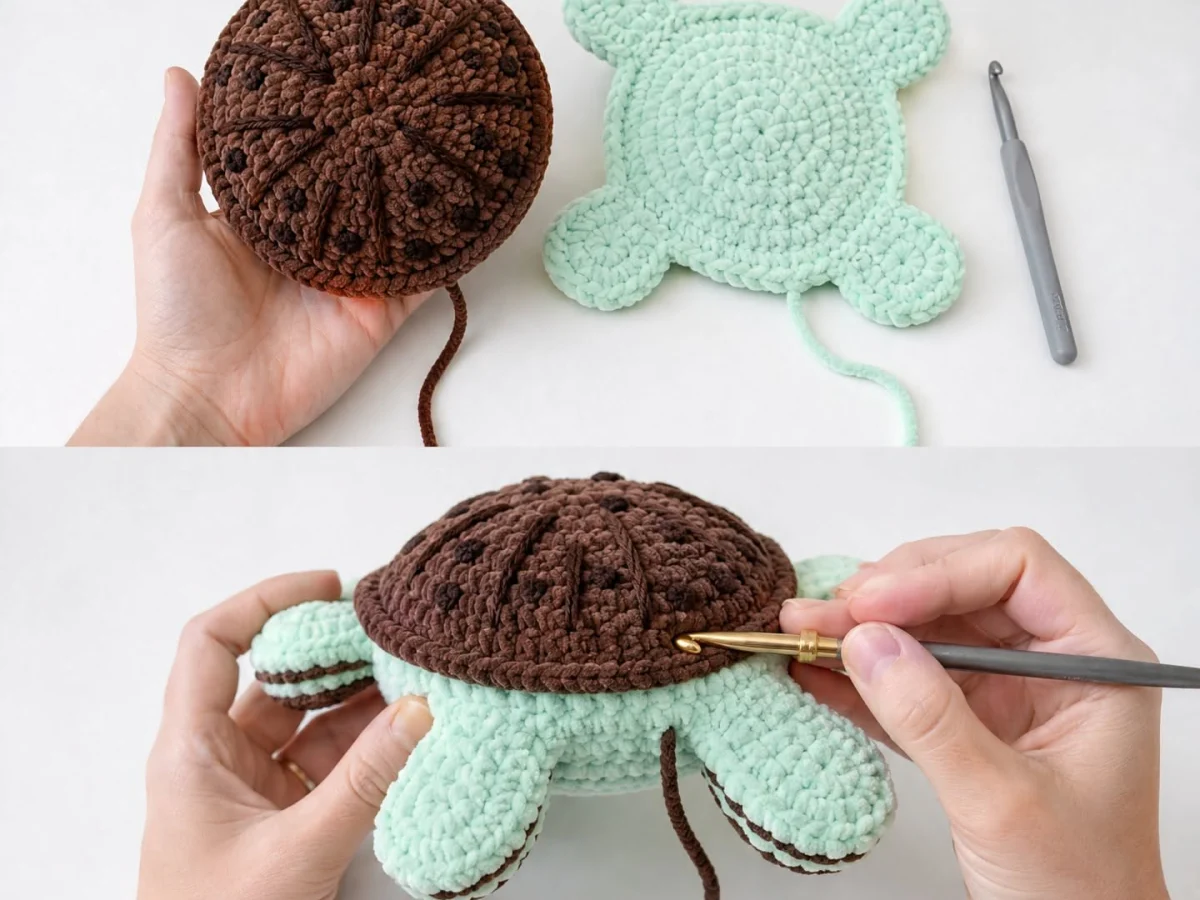
You crochet the shell and the body as two flat circles, then join them and stuff. The flippers and head are small tubes that you sew on at the end. The whole thing takes about two hours if you're comfortable with single crochet in the round.
I chose worsted weight yarn so the turtle holds its shape, but you can use any yarn you have. The pattern works the same with DK or bulky yarn, just adjust your hook and the finished size changes.
This free pattern walks you through every round, from the shell to the little flippers, using simple single crochet stitches. You'll end with a 6-inch turtle that makes a sweet gift or a shelf buddy.
What you need
Worsted weight yarn
Mint green for the body and chocolate brown for the shell. You'll need about 50 yards of each.
4.5 mm crochet hook
Use any hook that gives you a tight fabric. If you use a different yarn weight, adjust the hook size.
Yarn needle
For sewing parts together and weaving in ends.
Scissors
For cutting yarn.
Polyester stuffing
Enough to fill the shell and head. About a handful.
What you need to start
You'll need worsted weight yarn in two colors: mint green for the body and chocolate brown for the shell. A 4.5 mm hook is a good match for worsted weight, but you can use any hook that gives you a firm fabric. You also need a yarn needle, scissors, and stuffing.
If you don't have worsted weight, don't worry. Use any yarn you have on hand. For a smaller turtle, use DK yarn with a 3.5 mm hook. For a bigger one, try bulky yarn with a 6 mm hook. The stitch count stays the same.
Choose a soft acrylic or cotton yarn. The turtle gets handled a lot, so a washable fiber is a good idea.
Reading the pattern
The pattern uses US crochet terms. You'll see abbreviations like sc for single crochet, inc for increase (two stitches in one stitch), and dec for decrease (single crochet two together).
Work in a spiral, meaning you don't join rounds with a slip stitch. Use a stitch marker to keep track of the first stitch of each round. It's easy to lose your place, especially when you're increasing.
Place a marker in the first stitch of each round and move it up as you go. That small step saves you from counting every round.
Making the shell
Start with the brown yarn. Make a magic ring, work 6 single crochet into it, and pull tight. Then increase in every stitch to get 12. Keep increasing evenly each round until the circle measures about 4 inches across.
For a 4-inch circle, you'll work about 8 rounds. After that, work even rounds without increasing until the shell is about 1.5 inches deep. This creates a dome shape.
A common mistake is increasing too fast, which makes the circle ruffle. If that happens, rip out the last round and try again with fewer increases.
Check your circle lies flat on the table. If it waves, you added too many increases. If it curls up, you added too few.
Making the body and head
With the mint green yarn, make another circle the same size as the shell. This will be the belly. Do not fasten off.
For the head, work a small tube: start with 6 single crochet in a magic ring, increase to 12, then work 6 rounds even. Stuff it lightly and set it aside.
For the flippers, make four small tubes. Each one starts with 4 single crochet in a magic ring, then you work 4 rounds even. Leave a long tail for sewing.
Stuff the head firmly but not rock hard. You want it to keep its shape but still be squeezable.
Joining the shell and body
Place the shell on top of the belly, right sides out. With the mint green yarn still attached, single crochet through both layers around the edge. Leave a 2-inch opening.
Stuff the turtle through the opening. Aim for a firm but soft feel. Then close the opening with single crochet or a whip stitch.
Make sure the seam is even. If you pull the yarn too tight, the edge will pucker. Keep your tension relaxed.
Before closing, check that the shell sits centered. You can adjust it by shifting the stuffing.
Attaching the head and flippers
Sew the head to the front of the body, centered above the belly. Use the long tail and a yarn needle, stitching through the body and the head. Pull gently to secure.
Sew the flippers on the sides, two on each side, slightly toward the front. Position them so they point outward.
Weave in all ends. Trim any loose yarn. Your turtle is done.
If a flipper looks crooked, you can undo the seam and reposition it. No harm done.
Step
Crochet the shell
Make a magic ring with brown yarn, work 6 sc, increase to 12, then increase evenly until the circle is 4 inches across. Work even rounds until the shell is 1.5 inches deep.
Crochet the belly
Repeat the same circle with mint green yarn, but do not fasten off. Leave the loop on the hook.
Make the head
Start with a magic ring, work 6 sc, increase to 12, then work 6 rounds even. Stuff lightly.
Make the flippers
For each flipper, start a magic ring with 4 sc, work 4 rounds even. Leave a long tail.
Join shell and belly
Place the shell on top of the belly, right sides out. Sc through both layers around the edge, leaving a 2-inch opening. Stuff, then close the opening.
Attach head and flippers
Sew the head to the front center. Sew flippers on the sides. Weave in ends.
Ways to change it
Different yarn weight
Use DK or bulky yarn to change the size. The pattern works the same, but the finished turtle will be smaller or larger.
Color variations
Swap the mint for pink or blue, and the chocolate for a lighter tan. You can also use a variegated yarn for the shell.
Add a face
Embroider eyes and a smile with black yarn or embroidery floss. Do this before sewing the head to the body.
Make it a keychain
Attach a key ring to the top of the shell. Use a smaller hook and yarn for a mini version.
Use cotton yarn
Cotton makes a sturdier turtle that stands up well. It's a good choice if you plan to give it to a child.
The short version
- The turtle is made from two circles joined together, so it's a good beginner project.
- Use a stitch marker to keep track of rounds when working in a spiral.
- Check your circle lies flat before moving on; ruffles mean too many increases.
- Stuff firmly but not too hard, so the turtle keeps its shape.
- You can change the size by using different yarn weights.
- The pattern takes about two hours and uses simple single crochet stitches.
Questions people ask
How long does this pattern take to crochet?
About two hours for a beginner. If you're faster, it might take less.
Can I use any yarn for this turtle?
Yes, any yarn works. Just adjust your hook size to match the yarn weight.
What do I do if my circle ruffles?
Rip out the last round and try again with fewer increases. The pattern gives you the number of increases per round, but you can adjust.
How do I keep my stitching even?
Keep your tension relaxed and consistent. If you pull too tight, the fabric puckers.
Save this pattern for your next crochet afternoon
Once you've made one turtle, you'll see how easy it is to change colors and make a whole family. The same circle-and-tube method works for other animals too. Stitch with ease.