Crochet Guide Design Inspiration: How to Plan a Stitch Guide That Beginners Can Actually Follow
Plan a stitch guide that shows each step clearly, so a beginner can crochet a swatch without guessing.
A crochet guide fails when the reader cannot tell where the next stitch goes.
You have probably seen a crochet guide that looked pretty but left you lost by row three. The photos were too small, the steps jumped ahead, and the stitch count never matched.
This guide shows you how to design a crochet guide that works. You will plan the layout, choose the right symbols, and add the checks that keep a beginner on track.
Good crochet guide design puts one clear photo or symbol per step, names the exact hook and yarn, and shows the stitch count after each row. That way a beginner can check their work before moving on.
What you need
Worsted weight yarn
One ball in a light color shows stitch definition better than dark yarn. About 50 yards is enough for a small swatch.
Size H-8 (5.0 mm) hook
This is the most common hook for worsted weight. If your gauge runs tight, go up to a size I-9 (5.5 mm).
Tapestry needle
A blunt tip needle weaves in ends without splitting the yarn. Any size that fits your yarn works.
Stitch markers
Place one in the first and last stitch of a row. They stop the two most common counting mistakes.
Graph paper or a design app
Graph paper helps you lay out symbols by hand. A free design app works if you prefer to drag and drop.
Start with the reader, not the layout
Ask who will hold this guide. A total beginner needs one stitch per photo, a labeled hook size, and a clear stitch count after every row. A crocheter who already knows single crochet can handle two or three steps in one image.
Write the skill level at the top. If the guide uses half double crochet, say so before the first step, not in a note at the bottom.
If you are not sure, design for the beginner. Experienced crocheters can skip ahead, but a beginner cannot fill in missing steps.
Pick a grid that fits your steps
A three-column grid works for most crochet guides. Column one holds the step number and text, column two holds the photo or symbol, and column three holds the stitch count. On a phone, the columns stack and the count sits right under the photo.
Keep the text column narrow, about 40 to 50 characters per line. Long lines make a reader lose their place between the hook and the page.
Print a test page at 100 percent. If you cannot read the stitch count without leaning in, the type is too small.
Match symbols to words
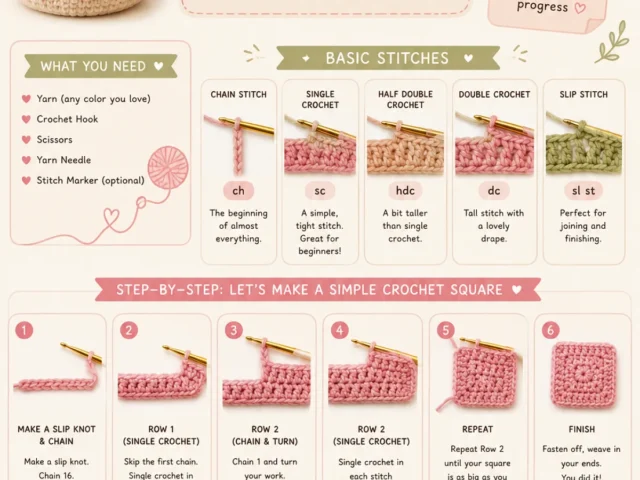
Crochet symbols are a language. A single crochet is a plus sign, a chain is an oval, and a slip stitch is a dot. Use the same symbol every time, and put a small key on the same page as the chart.
Write the abbreviation next to the symbol the first time it appears. Then the reader learns both at once.
- ch – chain
- sc – single crochet
- hdc – half double crochet
- dc – double crochet
- sl st – slip stitch
If your guide mixes UK and US terms, label them clearly. A US single crochet is a UK double crochet, and that mix-up costs a reader a whole evening.
Show the hook, yarn, and gauge up front
Put the supplies before step one. Name the yarn weight, the hook size in millimeters and US size, and the finished size of the swatch or piece.
Gauge matters when the piece has to fit. A common gauge for worsted weight yarn and a size H-8 (5.0 mm) hook is 16 single crochet stitches and 16 rows in 4 inches. If your gauge is off by two stitches, a 40-stitch scarf can end up an inch narrower.
Tell the reader to make a 4-inch swatch first. It takes about ten minutes and saves a whole project.
Write steps that can be checked
Each step should end with a way to know it worked. That might be a stitch count, a measurement, or a photo of the right side and the wrong side side by side.
Number every step. Use the same number in the photo, the text, and the chart so the reader can jump between them without searching.
If a step has no check, it is not finished. Add one, or fold it into the step before it.
Design for the mistakes people make
Most beginner errors happen at the start and end of a row. The first stitch gets skipped because the turning chain looks like a stitch. The last stitch gets missed because it hides under the turning chain.
Show both places with a close-up photo and a small arrow drawn on the image. Then add a line that says how many stitches the row should have.
- Skipped first stitch: row comes out one stitch short
- Missed last stitch: edge slopes inward
- Wrong turning chain: edge looks wavy
- Tight chain: first row curls and will not lie flat
Count your stitches at the end of every row until the edge looks straight without counting.
Test your guide with one real reader
Hand your guide to someone who has never crocheted. Ask them to work the first three steps without your help. Watch where they pause, and write down what they ask.
Those pauses are the gaps in your design. Fix the photo, add a stitch count, or split the step in two.
If they ask a question twice, the answer needs to be on the page, not in your head.
Step
Make a practice swatch
Chain 21. Work 20 single crochet across, then turn. Repeat for 20 rows. You should have a square about 4 by 4 inches. If it is smaller, your gauge is tight and you should go up one hook size.
Photograph each step
Take one photo per step, straight from above, on a plain background. Check that the working loop and the next stitch are both visible before you move on.
Label the photos
Add a small arrow or number to each photo. Point to the exact stitch the hook goes into, not the general area. If a reader has to guess, the label is not clear enough.
Write the stitch count after every row
After each row, write the number of stitches you should have. For a 20-stitch swatch, every row stays at 20. If your count drops, you skipped a stitch.
Add a symbol key
Draw or type each symbol next to its abbreviation. Put the key on the same page as the chart so the reader never has to flip back.
Check the finished edge
Lay the swatch flat. The sides should be straight and the same height. A wavy edge means your turning chain is too long or too short.
Ways to change it
Photo-only guide
Best for absolute beginners who do not read charts yet. Use one large photo per step.
Chart-only guide
Best for crocheters who already know the symbols. It saves space and prints on one page.
Left-handed version
Mirror every photo and keep the text the same. Left-handed readers work in the opposite direction.
Video companion
Add a short clip for the trickiest step. Keep it under 60 seconds so it loads fast on a phone.
Printable one-page card
Fits in a project bag. Use 12-point type and a single column so it stays readable.
The short version
- One clear photo per step beats three blurry ones.
- Name the yarn weight and hook size in millimeters before step one.
- A stitch count after every row lets a reader catch mistakes early.
- The first and last stitch of a row cause most beginner errors.
- A 4-inch gauge swatch takes about ten minutes and prevents size surprises.
- Test the guide on one real beginner and fix the places they pause.
Questions people ask
What hook size should a beginner crochet guide use?
A size H-8 (5.0 mm) hook with worsted weight yarn is the easiest starting point. It is big enough to see the stitches and common enough that most beginners already own one.
How many photos does each step need?
One clear photo per step is enough if the stitch is visible. Add a second photo only when the step has a before and after, like a turning chain.
Do I need a gauge swatch for a small project?
For a coaster or a small swatch, gauge does not matter much. For anything that has to fit, like a hat or a garment, check gauge first. Two stitches off can change the finished size by an inch or more.
What is the most common mistake in a beginner crochet guide?
Skipping the first stitch of a row, because the turning chain looks like a stitch. Show that spot with a close-up photo and a stitch count, and the mistake drops fast.
Plan your first guide page today
Start with one stitch and one page. Make the swatch, photograph each step, and write the count after every row. That small page will teach more than a ten-page guide with missing steps.