Amigurumi Pattern Library Illustration: How to Read a Crochet Doll Chart
Learn what every symbol, arrow and number on an amigurumi pattern sheet actually tells you to do.
A single missing increase symbol on a doll chart turns a round head into a cone, and you will not notice until round nine.
Amigurumi charts look like a foreign language at first. They are not. A good illustration sheet is just a map of one doll, drawn small enough to fit on a page.
This guide walks through what each part of that sheet means, where people misread it, and how to fix a round that has already gone wrong.
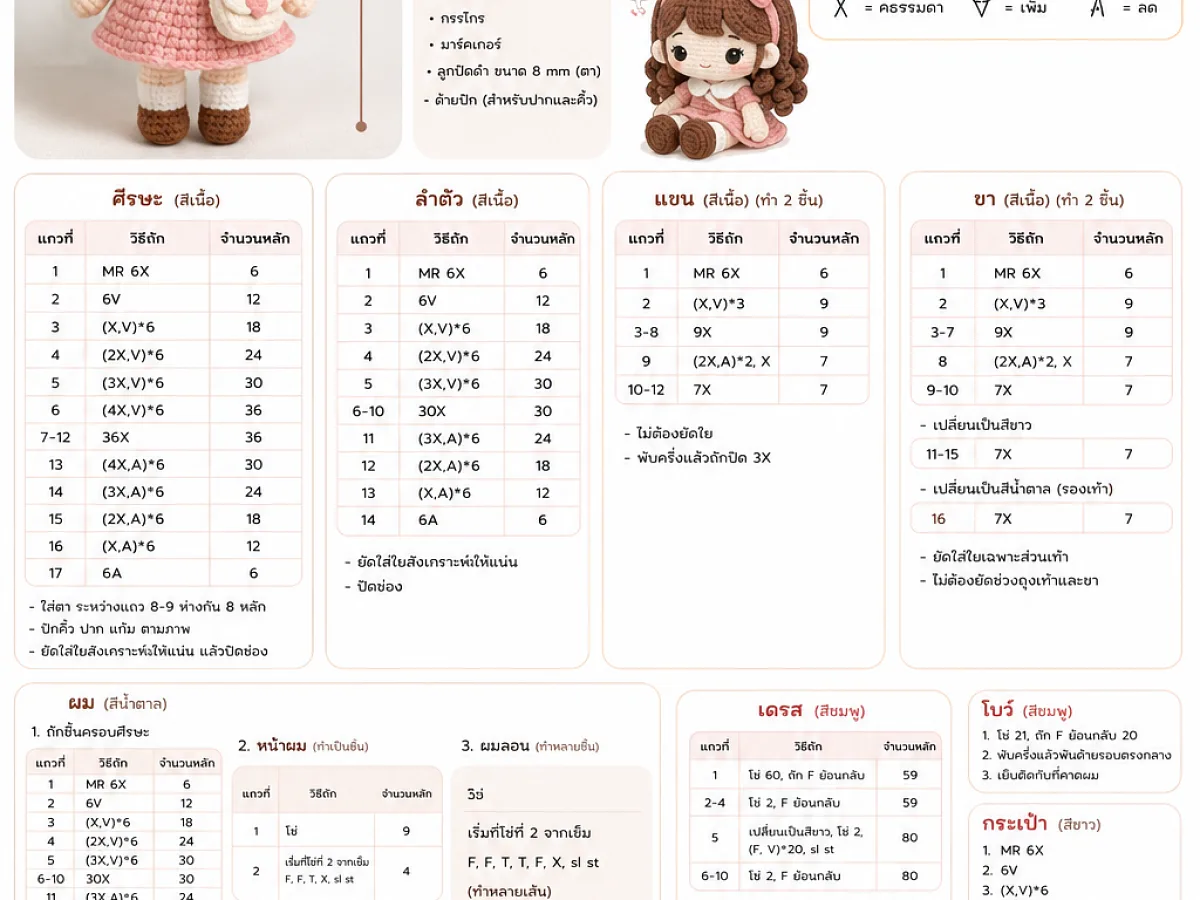
An amigurumi pattern library illustration is a drawn reference sheet: symbols, arrows and stitch counts that show how a doll is built round by round. Read the symbol key first, then work the chart in a spiral, and check your count at the end of every round.
What you need
DK weight cotton yarn
About 50 g covers a small doll in one colour. Cotton holds shape better than acrylic for amigurumi.
2.5 mm to 3.5 mm hook
Go down one size from the yarn label. Smaller hooks give the tight fabric that keeps stuffing hidden.
Polyester toy stuffing
A small handful per doll. Add it after the piece is closed, in small pinches, not one big lump.
Stitch markers
At least two. One marks the round start, the other holds a count you do not want to lose.
Tapestry needle
Blunt tip, large eye. It should pass through the stitches without splitting the yarn.
Safety eyes, 6 mm to 9 mm
Match the size to the head. Locking washers go on the inside before you close the last round.
What an amigurumi pattern library illustration actually contains
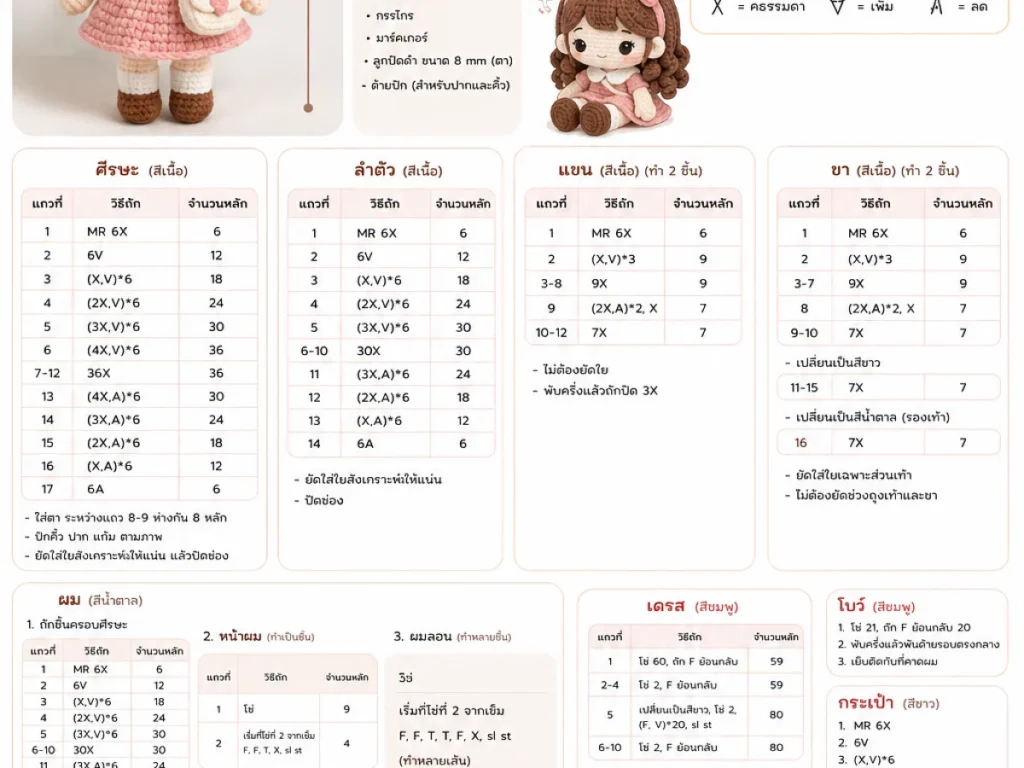
A pattern library illustration is not one drawing. It is a set of drawings that work together. You usually get a symbol key, a round-by-round chart, a small photo of the finished doll, and a stitch count written beside each round.
The symbol key is the important one. It tells you that a cross means single crochet, a V shape means increase, and an upside-down V means decrease. Different designers use different marks, so never assume. Read the key on the sheet in front of you.
If the key is missing, count the symbols in round one. Six single crochets in a magic ring is standard for most doll heads.
Yarn, hook and gauge for doll charts
Most amigurumi charts are written for DK weight yarn, around 8 ply, with a 2.5 mm to 3.5 mm hook. The hook is deliberately smaller than the yarn label suggests. That is what stops the stuffing showing through.
Gauge matters here more than in most crochet. If your stitches are loose, the head comes out wide and the body looks pinched. Work a small swatch in single crochet, then measure 10 stitches across. For a typical doll chart you want those 10 stitches to measure about 4 cm.
Tighten by dropping one hook size rather than pulling harder on the yarn. Pulling changes your tension mid-round and makes the fabric lumpy.
Cotton yarn shows stitch definition better than acrylic, which makes chart symbols easier to compare against your work.
Abbreviations you will see beside the chart
Charts and written notes usually sit together, so learn the short forms. They are the same across most pattern libraries.
- sc – single crochet
- inc – two single crochet in the same stitch
- dec – single crochet two stitches together
- sl st – slip stitch
- ch – chain
- MR – magic ring
- FO – fasten off
- BLO – back loop only
A decrease made with the invisible method leaves less of a gap than a standard one. It costs you ten extra seconds per stitch and looks much cleaner on a face.
How to read the chart round by round
Charts are read in a spiral, not in rows. Start at the centre marker, which is usually a filled dot or a small circle. Follow the symbols outward, anticlockwise if you are right-handed.
Each ring of symbols is one round. The number at the end of the ring is your target stitch count. Stop and count before you start the next round. Catching a mistake one round late costs you two minutes. Catching it six rounds late costs you the head.
What goes wrong, and how to tell
The most common error is losing the start of the round. The spiral shifts by one stitch each time, and by round eight the increases sit in the wrong place. The head leans. You can spot it early: lay the piece flat and look at whether the increase lines radiate straight out like spokes.
The second error is skipping a decrease on a body chart because the symbol is small. The result is a body that will not taper at the neck. If the collar area looks wide, count that round again.
The third is stuffing too early. Stuff the head only after the last round is closed, or the yarn catches on the filling and pulls it through.
If you find a mistake three rounds back, it is usually faster to pull back than to patch it. Amigurumi hides very little.
Reading the finished-size box
Pattern library sheets usually print a finished size, something like 12 cm tall with the stated yarn and hook. That number assumes your gauge matches. If your doll comes out 14 cm, your stitches are loose, not the chart.
Size also changes with yarn weight. The same chart worked in worsted weight with a 4 mm hook gives a doll roughly a third bigger. That is a legitimate way to make a larger version without rewriting anything.
Write your own finished measurement on the sheet after the first doll. It saves you guessing next time.
Step
Read the symbol key first
Identify every mark before you make a stitch. Cross for single crochet, V for increase, inverted V for decrease.
Find the centre and start the spiral
Begin at the centre marker and work outward. Right-handed crocheters follow the rings anticlockwise.
Check the count each round
Match your total to the number printed beside the ring. Fix it now, not later.
Work the shaping rounds in order
Increases build the head, straight rounds form the body, decreases close the top. Follow the chart order exactly.
Close, stuff and assemble
Fasten off leaving a long tail, stuff in small pinches, then sew the pieces together with the same yarn.
Ways to change it
Worsted weight version
Same chart, 4 mm hook, roughly a third larger. Good for a first doll because the stitches are easier to see.
Thread crochet version
Size 10 thread with a 1.5 mm hook gives a doll about 5 cm tall. Keyring size, but hard on the hands.
Two-colour body
Change colour on a straight round, never on an increase round. The join sits straighter.
Blanket yarn version
Super bulky yarn with a 6 mm hook makes a soft, chunky doll in about two hours. Stuff lightly or it goes firm.
Left-handed reading
Work the rings clockwise instead. The chart is the same, only your direction changes.
The short version
- Read the symbol key before the chart, because marks differ between designers.
- Charts are worked in a spiral, one ring per round, from the centre outward.
- Count your stitches at the end of every round, not at the end of the piece.
- Gauge changes the finished size, so a loose stitch gives a wider doll.
- Invisible decreases leave a cleaner face than standard ones.
- Stuff after the piece is closed, in small pinches.
Questions people ask
Do I need to know how to read charts to make amigurumi?
No, but it helps. Most pattern libraries print the written round and the chart side by side, so you can follow whichever makes more sense to you. Charts become faster once you know the key.
Why does my doll head come out pointy?
You probably missed an increase in the early rounds. Lay the piece flat and check whether the increase lines run straight out like spokes. If they curve, count that round again.
What hook size should I use for amigurumi?
Go one size smaller than the yarn label recommends. For DK weight that usually means 2.5 mm to 3.5 mm. The tighter fabric stops the stuffing showing through.
Can I use the same chart with thicker yarn?
Yes. The chart does not change, only the finished size does. Worsted weight with a 4 mm hook gives a doll roughly a third bigger than the printed measurement.
How do I stop the stuffing poking out?
Use a smaller hook and add the stuffing after the last round is closed. Push it in small pinches rather than one lump, so it fills the shape evenly.
Pick one chart and work the first three rounds tonight
Start with the symbol key, count every round, and mark your round start. Those three habits fix most of what goes wrong with an amigurumi pattern library illustration.