Printable Crochet Patterns: How to Read, Print, and Use Them
Learn to read a printable crochet pattern, print it without wasting ink, and finish your project with confidence.
Printable crochet patterns are just PDFs, but they can feel like a secret code until you know the tricks.
You found a pattern you love, hit print, and now you have a stack of paper that might as well be in another language. That is normal. Even experienced crocheters get stuck on a new pattern sometimes.
The good news is that printable patterns follow a clear structure. Once you know what to look for, you can read any of them. This guide shows you how to print smart, read the symbols, and catch mistakes before they cost you hours.
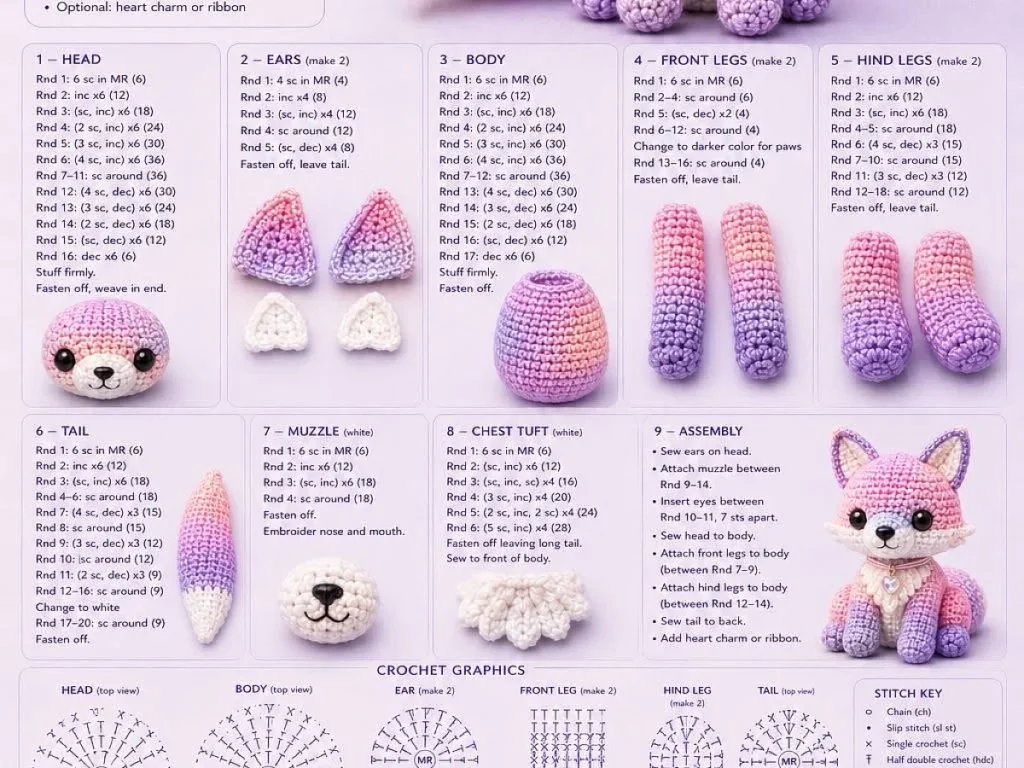
Printable crochet patterns are digital files you print at home. They usually include a stitch key, a list of supplies, and step-by-step instructions. You can read them like a recipe, and you can print only the pages you need.
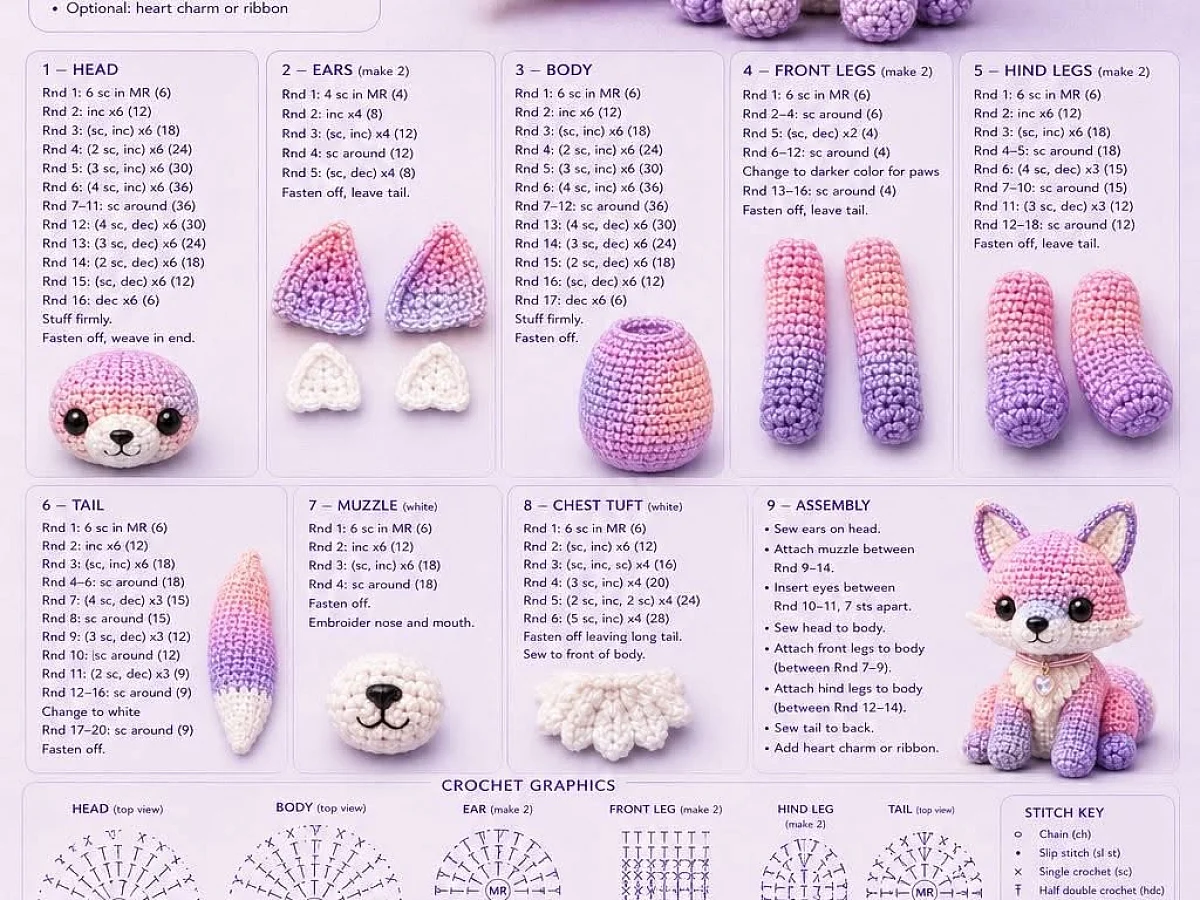
What you need
A printed pattern
Print the pages you need, not the whole file. A draft copy on plain paper is fine for working.
Yarn in the right weight
The pattern will say a yarn weight like worsted or DK. Use the same weight, or your gauge will be off.
The recommended hook size
Usually listed on the pattern or the yarn band. If you are a tight or loose crocheter, you may need to adjust.
Stitch markers
Use them to mark the start of a round or a repeat. You can use safety pins or scrap yarn.
A yarn needle
For weaving in ends. A blunt-tip needle works best for most yarns.
How to print a crochet pattern without wasting paper
Most patterns come as PDFs. Open the file and look at the page count before you print. Many patterns have a cover page with a photo and a lot of white space. You do not need that page.
Print only the pages with the instructions. In the print dialog, enter the page numbers you want. If the pattern has a chart, print it on its own page so it stays flat.
Set the scale to 'Fit to Page' so nothing gets cut off. If you want a smaller copy, choose 'Multiple pages per sheet' and print two pages on one sheet. That works well for small projects like coasters.
Print on plain paper for a draft. Once you know it works, print the final copy on cardstock so it survives being folded in your bag.
What do the abbreviations mean?
Patterns use short codes for stitches. The most common are ch for chain, sc for single crochet, hdc for half double crochet, dc for double crochet, and tr for treble crochet. Most patterns list these in a key at the top or bottom.
If a pattern does not explain an abbreviation, look it up online. The Craft Yarn Council has a standard list that most designers follow. Write the key on a sticky note and keep it on the page you are working from.
If you see a symbol you do not know, circle it and look it up before you start. It is easier than guessing halfway through.
How to read the stitch counts and repeats
Patterns often say things like 'Row 3: dc in next 2 sts, 2 dc in next st, repeat from * to end.' The asterisk marks the start of a repeat. You do the part between the asterisk and the comma over and over until you reach the end of the row.
The number in parentheses at the end of a row, like (24 sts), tells you how many stitches you should have when the row is done. Count your stitches at the end of every row. It takes ten seconds and saves you from ripping out a whole section later.
If you lose your place, use a row counter or a piece of scrap yarn. Slide the yarn through the last stitch of every tenth row. That way you can count rows without starting over.
When a pattern says 'repeat from *', put a stitch marker in the first stitch of the repeat. That way you know where to start the next one.
How to know if you are doing it right
The gauge tells you how many stitches and rows fit in a four-inch square. If your gauge matches the pattern, your finished piece will be the right size. If it does not, your project will be too big or too small.
To check gauge, make a small swatch with the recommended hook and yarn. Measure it. If you have more stitches than the pattern says, try a bigger hook. Fewer stitches? Use a smaller hook.
Common mistakes include turning chains that are too tight, missing the first stitch, or working into the wrong loop. If your edge looks wavy, you are probably adding stitches. If it pulls in, you are probably skipping some.
When you finish a row, count the stitches before you turn. It is much easier to fix a mistake right away than to frog three rows later.
How to finish and weave in ends
When the pattern says 'fasten off', cut the yarn leaving a tail about six inches long. Pull the tail through the last loop on your hook and tighten gently.
Weave in the ends with a yarn needle. Go back and forth through the stitches on the wrong side, then trim the extra. Do not cut the tail too short, or it will work its way out.
Blocking can make your work look neater. For acrylic yarn, use a steam iron held a few inches above the piece. For wool, wet it and pin it to shape. Check the yarn label for care instructions.
Weave in ends as you go, one at a time. If you leave them all for the end, you will have a pile of tails and no patience left.
Step
Read the pattern through once
Skim the whole pattern. Look for the supplies, the gauge, and the special stitches. Make sure you understand the abbreviations before you pick up your hook.
Print only what you need
Open the PDF and note the page numbers. Print just the instruction pages. If there is a chart, print it on its own page.
Check your gauge
Make a swatch with your yarn and hook. Measure it. Adjust your hook size if needed so your swatch matches the pattern gauge.
Mark your place
Use a highlighter to mark the row you are on. Move it up as you go. This keeps you from losing your spot when you put the project down.
Count stitches at the end of every row
Compare your stitch count to the number in parentheses. If it is wrong, fix it now. It is easier than ripping out a whole section later.
Weave in ends as you finish
When you fasten off, weave the tail in right away. Use a yarn needle and go through the backs of the stitches. Trim the extra.
Block your finished piece
If the pattern calls for blocking, do it. For acrylic, steam gently. For wool, wet and pin. This makes your stitches even and your edges straight.
Ways to change it
Different yarn weight
If you use a lighter yarn and a smaller hook, you get a smaller piece. Use a heavier yarn and bigger hook for a larger one. Your gauge will change, so check it.
Print on cardstock
For patterns you will use again, print on cardstock. It holds up to folding and bag stuffing.
Digital version
Keep the PDF on your phone or tablet. You can zoom in on charts and never lose a page.
Highlighted copy
Print a second copy and highlight the rows you have done. This is great for patterns with many repeats.
Large print
If the font is small, print at 125% or 150%. The pattern will be easier to read, and you can trim the edges.
The short version
- Printable crochet patterns are PDFs you can print at home.
- Always check the gauge before you start.
- Abbreviations are the key to reading any pattern.
- Count your stitches at the end of every row.
- Use stitch markers to keep your place in repeats.
- Weave in ends as you go to save time later.
- Blocking makes your finished piece look neater.
Questions people ask
How do I print a crochet pattern without wasting ink?
Print only the instruction pages, not the cover or photo pages. In the print dialog, enter the page numbers you need. You can also print in draft mode to save ink.
What does 'sc in each st around' mean?
It means single crochet in every stitch from the previous round, without increasing or decreasing. You will have the same number of stitches as before.
Why does my crochet project look smaller than the pattern?
Your gauge is probably tighter than the pattern's. Try a larger hook. If the project is bigger, your gauge is looser, so try a smaller hook.
How do I know if I'm doing the right stitch?
Look at the stitch key. Each stitch has a symbol or abbreviation. Practice the stitch on a small swatch before you start the project.
Can I use a different yarn than the pattern says?
Yes, if you use the same weight and check your gauge. A different brand is fine. Just make sure the yarn weight matches.
Print this guide and keep it with your next pattern.
Reading a printable crochet pattern is a skill, and you just took a big step. Print your next pattern, check the gauge, and count your stitches. You will finish with something you are proud of. Happy hooking!